This site is supported by our readers. We may earn a commission, at no cost to you, if you purchase through links.
 Dear friend, life without silky, smooth hair is no life at all! The endless battle against frizz can feel like an impossible war, with unruly, out-of-control hair always winning the fight.
But take heart – with the power of keratin, you can transform your hair and restore order to your world.
Though the name sounds mysterious, keratin is simply a natural protein already found in your hair. By using special treatments to infuse extra keratin deep into each strand, you can strengthen your hair and leave it looking sleek, shiny, and impossibly straight for months.
Don’t despair over frizzy locks a moment longer – unleash the magic of keratin, and tame that mane with just a few simple home treatments.
Let me walk you through exactly how keratin works and the easy steps to get salon-gorgeous hair on your own time.
With the right know-how, you can have the hair of your dreams – soft, smooth and straight from the comfort of your couch.
Table Of Contents
- Key Takeaways
- What Are Keratin Treatments?
- Benefits of Keratin Treatments
- Side Effects of Keratin Treatments
- At-Home Vs. Salon Keratin Treatments
- How to Prepare for a Keratin Treatment
- How to Apply a Keratin Treatment at Home
- How to Rinse and Dry Your Hair After a Keratin Treatment
- How to Maintain Your Keratin Treatment
- Best At-Home Keratin Treatment Products
- Final Tips for Using Keratin Treatment at Home
- Conclusion
Key Takeaways
- Properly prepare your hair with a sulfate-free clarifying shampoo before applying the keratin treatment.
- Carefully follow the instructions provided with your at-home keratin treatment kit for the best results.
- Avoid washing your hair for at least 3 days after the treatment. Afterwards, use only sulfate-free shampoos.
- Limit heat styling after the treatment, but you can blow dry and flat iron on a low setting to seal in the keratin when needed.
What Are Keratin Treatments?
Keratin treatments smooth your hair by sealing the cuticle and reducing frizz for a glossy, straighter style you can do yourself at home. These treatments infuse essential proteins into your hair for transformative benefits.
Home keratin kits offer significant advantages over salon versions, including affordability, customization, and the ability to avoid harsh chemicals.
When properly applied, keratin treatments boost manageability for all hair types, especially curly or frizzy hair that is prone to humidity. The effects of these treatments can last from several weeks to months. Keratin also helps repair damage and protects hair.
With the right prep, patience during application, and proper aftercare, DIY kits can deliver salon-worthy straight, sleek, and frizz-free hair.
Benefits of Keratin Treatments
Are you looking to enhance the texture of your hair? Keratin treatments are a great way to do just that. A type of hair-smoothing treatment, keratin treatments infuse protein into your strands, reducing frizz and improving shine for long-lasting results.
Enhanced hair texture.
You’ll smooth silky strands safely, sincerely straightening stubborn styles without salon.
A keratin treatment enhances hair texture immensely, leaving your tresses impossibly touchable.
- Nourishes parched ends
- Targets unruly curls
- Tames frizz
- Makes hair more manageable
DIY options allow you to transform your hair hassle-free. With proper techniques, you’ll achieve sleek, shiny strands from the comfort of home.
Reduced frizz and humidity.
With a keratin treatment, you can experience reduced frizz and improved protection from humidity for long-lasting results. The keratin application seals the hair cuticle, blocking out humidity that causes frizz and poofiness.
When selecting products, look for ones containing peptides and oils to combat humidity. Follow all post-treatment instructions carefully, including avoiding washing for several days, to get the most frizz control from your keratin treatment.
Improved hair shine
Your shiny, mirror-like hair will be the envy of all after this treatment! The keratin seals down the cuticle for a glossy finish. Using clarifying shampoos or homemade alternatives with apple cider vinegar can provide a weekly boost.
Avoid heavy heat styling and opt for keratin-rich products containing natural oils. Let your hair air dry when possible and use a mask weekly. With some simple at-home maintenance, your hair’s radiant shine will last between treatments.
Side Effects of Keratin Treatments
Being in the dark about side effects could leave you with damaged, brittle hair. While keratin treatments offer sleek, frizz-free styling, overuse carries risks.
- Formaldehyde exposure. Many keratin treatments contain this known carcinogen or formaldehyde-releasing agents.
- Hair damage. Overprocessing strips hair cuticles, causing brittleness and breakage over time.
- Allergic reactions. Some individuals may experience skin irritation or breathing issues from chemicals in keratin treatments.
Stay informed, and consult a trusted stylist for professional guidance. With the right precautions, you can safely achieve your hair goals and minimize any treatment side effects.
At-Home Vs. Salon Keratin Treatments
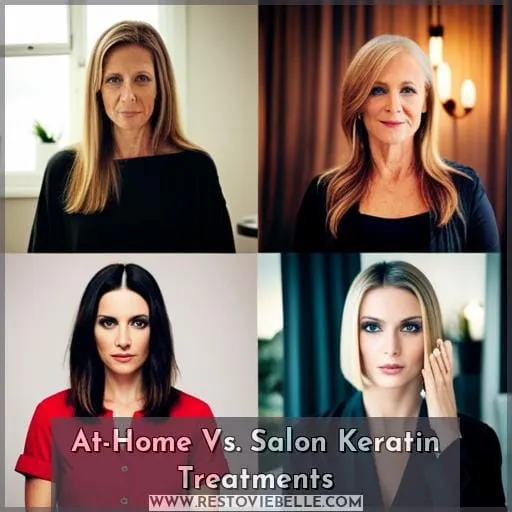
At-home kits offer greater affordability and customization. You control the process start to finish. However, effectiveness varies. Some kits simply can’t match the strength of professional formulas and techniques.
At-home treatments also raise safety concerns without proper training. Application mistakes risk damage. Duration expectations require managing too. Many DIY versions fade faster. Styling versatility may suffer as well if straightening isn’t thorough.
Ultimately, salon treatments excel in durability, safety, and results. The price comes at a premium but certified stylists properly apply stronger formulas for lasting, versatile looks. Still, DIY kits provide a budget-friendly introduction if you take precautions. Test small sections first and follow all instructions carefully.
How to Prepare for a Keratin Treatment
Before your at-home keratin treatment, be sure to shampoo with a clarifying or sulfate-free shampoo and thoroughly rinse your hair. Then, section your dry hair into four quadrants and closely follow the kit’s instructions to evenly distribute the product for the best results.
Shampoo Your Hair
Y’all need to shampoo thoroughly with a clarifying shampoo before applying the keratin treatment.
- Removing product buildup
- Eliminating oils and residue
- Deep cleaning from root to tip
- Lifting dirt and impurities
- Preparing hair for maximum keratin absorption
Shampooing ensures your strands are squeaky clean for the treatment to penetrate and work its magic. Select a sulfate-free clarifying shampoo to avoid stripping your hair. Massage it into your scalp and lengths, leaving it on for a few minutes before rinsing thoroughly.
Section Your Hair
A penny saved is a penny earned, so hunker down, divide your hair into sections for an even keratin treatment. Separating your locks into sections allows the product to penetrate every strand. Work methodically, taking thin horizontal layers from front to nape. Remember—slow and steady wins the sleek, frizz-free race.
Follow the Instructions
You’ll want to carefully follow the kit’s instructions for applying the keratin treatment.
- Ensure you have all required tools – gloves, applicator brush, hair clips, shower cap, etc.
- Read all directions thoroughly before starting and follow the step-by-step process.
- Use a timer to accurately time the product processing and avoid rinsing prematurely.
Stick to the recommended timeframes, tools, and techniques in the instructions for the best smoothing results.
How to Apply a Keratin Treatment at Home
When applying an at-home keratin treatment, be sure to distribute the product evenly throughout your hair while wearing gloves to prevent skin irritation. After application, let the treatment process under a shower cap for the specified time before moving on to rinsing, blow drying, and flat ironing.
Apply the Treatment Evenly
For optimal results, section and distribute the treatment evenly with gloved hands. Even application ensures successful DIY results that last and provide a professional-grade outcome. Avoid any patchiness or uneven processing. After applying the treatment, do not rinse and proceed to blow-dry.
Follow the post-care guidelines for long-lasting effects. When using the GK Hair product, apply it from the scalp in sections. For Keratin Revival, use an applicator brush specifically for the roots. When using Re:unite, spread it evenly with a tint brush.
For DAMANCI, part the hair and distribute the treatment using gloves. With the correct technique, keratin treatments can last between 3 to 6 months.
Use Gloves
Slip on the provided gloves before applying the keratin treatment to ensure even product distribution. The gloves act as a barrier between your skin and the chemical ingredients. This protects your hands during the application process.
- Prevent skin irritation
- Enable smooth application
- Reduce product waste
- Avoid transferring oils to hair
The included gloves are crucial for properly administering the at-home keratin treatment. They allow you to thoroughly coat each section while shielding your hands. Following all safety precautions leads to optimal results.
Allow the Treatment to Sit
After distributing the product evenly, let the keratin treatment sit on your hair with a shower cap for the duration suggested (typically 30-90 minutes) to allow full penetration for optimal straightening and frizz reduction.
Interestingly, one study found up to 95% of participants reported less frizziness after a professional keratin treatment.
How to Rinse and Dry Your Hair After a Keratin Treatment
After applying your at-home keratin treatment, the next steps are rinsing your hair thoroughly and then blow-drying and flat ironing it. You’ll want to rinse out all traces of keratin product using cool or lukewarm water.
Don’t shampoo yet! Once hair is rinsed, wrap it in a towel to absorb excess moisture.
Then, it’s time to blow-dry your hair with a round brush to maximize smoothness. Finish by flat ironing small sections on low heat to seal in the treatment. This helps the keratin fully penetrate each strand while avoiding damage from high heat.
With the proper post-rinse and drying routine, you’ll achieve sleek, frizz-free locks from your at-home keratin treatment.
Rinse Your Hair
Remove the shower cap and rinse your hair thoroughly to get rid of any residual product. Do not shampoo after rinsing, as this will strip the treatment. Let your hair air dry or use a blow dryer on a cool setting to seal in the treatment.
Avoid rinsing your hair for 72 hours post-treatment and use only sulfate-free shampoos sparingly. This allows the keratin to fully penetrate the hair cuticle for smooth, frizz-free strands.
Blow-Dry and Flat Iron Your Hair
You’ll blow-dry and flat iron your hair in small sections to seal in the keratin treatment. Use a round brush while blow-drying to smooth hair. Next, set the flat iron to the proper temperature and pass over 1-inch sections slowly to lock in results.
Always use a heat protectant spray beforehand and don’t overdo the heat styling to avoid damage.
Avoid Washing Your Hair
For the first few days, refrain from washing your hair to ensure your keratin treatment lasts. Avoid rinsing your hair and do not get it wet for at least three days after the treatment; this allows the keratin to fully penetrate the hair shaft.
- Use a shower cap when bathing.
- Avoid swimming or activities causing perspiration.
- Let your stylist know when planning your next hair wash.
Following post-treatment instructions carefully is the key to getting long-lasting, frizz-free results from your new keratin treatment.
How to Maintain Your Keratin Treatment
Many of us desire smooth, sleek hair but lack the time or money for frequent salon keratin treatments. To get the most longevity and value from your keratin treatment, whether from a salon or at home, follow these simple maintenance tips.
Avoid Sulfates and Harsh Chemicals
Didn’t you know sulfate-free shampoos help prolong your keratin treatment’s effects? Rinsing with harsh soaps or chemicals too soon strips the keratin coating. After your treatment, use gentle, sulfate-free shampoos and conditioners to lock in smoothness.
Avoid products with sodium chloride, sulfates, or parabens – these can quickly diminish results. Instead, stick to chemical-free, nourishing formulas for healthy hair. Ideal products for maintaining soft, frizz-free strands often contain argan oil, coconut oil, aloe vera, or shea butter.
With the right sulfate-free products, you’ll get the most from your keratin treatment.
Limit Heat Styling
Let heat styling take a back seat to enhance longevity. Embrace heatless styling like braids, twists, and buns to protect hair between washes. Try heat-free techniques such as towel drying, air drying, or silk wraps for volume and waves.
Prioritize hair health over high heat hairstyling. Explore no-heat hairstyles to maintain your treatment and hair integrity longer. Bandanas, headscarves, and hats keep styles looking polished without heat damage.
Best At-Home Keratin Treatment Products
You’re looking to try an at-home keratin hair treatment for the first time. Two popular options are the Keratin Revival Kit, which uses natural oils to straighten and repair hair, and the GK Hair Kit, a salon-quality system that reduces frizz and curls for smooth, sleek hair right at home.
The Keratin Revival Kit could be a good option if you want a treatment formulated with plant-based ingredients like argan oil and coconut oil. It helps smooth hair and makes styling easier. The GK Hair Kit uses a patented formula with formaldehyde-free keratin to deeply penetrate strands for a frizz-free look that can last up to four months.
This kit mimics salon treatments, so it’s great if you want dramatic results from a product you use at home. Both kits come with everything you need for the treatment process. Keep in mind the GK Hair Kit uses a stronger formula, so the Keratin Revival may be a better option if you have sensitive skin or want something with a gentler effect.
Keratin Revival Kit Brazilian Keratin Hair Treatment Anti Frizz Revitalizing
Being diligent in your research and preparation ensures your satisfaction with at-home keratin hair treatments. The Keratin Revival Kit is formaldehyde-free with coconut oil and nut butters for hydration.
Reviews mention application challenges, so follow the instructions carefully. Note that visible smoothing results happen immediately, with the treatment lasting 3-5 months. However, customers question the durability after the first wash. Overall, this kit offers an affordable at-home alternative for sleek, frizz-free hair when applied properly.
GK Hair Keratin Treatment Kit
You’d be as wise as an owl to go for GK Hair’s treatment kit if you want silky smooth locks without breaking the bank. This salon-quality kit tames the wildest curls into sleek strands with lasting results for a fraction of the salon cost.
Users confirm it effortlessly transforms stubborn frizz and damage into soft, healed tresses. With the proper technique, you too can experience dramatic improvements in texture, manageability, and shine from the comfort of home.
Final Tips for Using Keratin Treatment at Home
Prepping your hair beforehand brings the best at-home keratin treatment results. Clarify hair to remove buildup, ensuring the treatment soaks in evenly.
Section clean, towel-dried hair into four quadrants, securing with clips. This allows precision targeting of each strand.
Have ready:
- Clarifying shampoo
- Treatment product
- Wide-tooth comb
- Shower cap
- Blowdryer
- Flat iron
Realistic expectations help avoid disappointment. While professional treatments tend to last longer, three months of smoothed hair from an at-home kit offers noticeable improvements. Follow provided instructions exactly, repeating applications if needed. Document the experience and tweak your approach over time, achieving your ideal texture through careful trial and error.
Conclusion
How will your hair transform with keratin treatments? This smoothing process enhances your natural texture for sleeker, shinier strands. The active protein penetrates each cuticle to fight frizz even on the most humid days.
While professional salon services yield longer-lasting results, at-home kits provide a more budget-friendly option to experience the rewards of keratin. Take your time, follow all instructions carefully, and you can achieve straighter, softer tresses.
Keratin treatments offer solutions for all hair types to look and feel rejuvenated.


