This site is supported by our readers. We may earn a commission, at no cost to you, if you purchase through links.
 You’ll master how to use hair clippers in no time with these pro tips.
Start with clean, dry hair and select the right guard size – #1 for super short, #8 for longer cuts.
Hold the clippers firmly and move against hair growth in smooth, steady strokes.
Start at the neckline and work your way up, keeping consistent pressure.
Don’t rush – good haircuts are like good coffee, they take patience.
For the sides, use upward strokes and blend between different guard lengths.
Remember to oil your clippers regularly.
Once you’ve got these basics down, you’re ready to explore advanced techniques like fades and texturing.
Table Of Contents
- Key Takeaways
- Preparing for a Clipper Cut
- Holding and Moving Clippers Correctly
- Understanding Clipper Guards and Sizes
- Clipper Cutting Techniques and Strokes
- Cutting Popular Hairstyles With Clippers
- Using Clippers on Yourself
- Cutting Someone Else’s Hair With Clippers
- Maintaining Your Haircut
- Clipper Maintenance and Tips
- Troubleshooting Common Clipper Issues
- Frequently Asked Questions (FAQs)
- How to cut hair with Clippers?
- How do you use hair clippers without a guard?
- What are the best hair clippers for beginners?
- How to use Clippers on Yourself?
- Can you cut someone else’s hair with Clippers?
- Should you buy professional hair clippers?
- What is the proper way to use hair clippers?
- Do you guard up or down on clippers?
- How to cut hair at home with clippers?
- Should the lever be open or closed on hair clippers?
- How long should I wait between haircuts?
- Can I use hair clippers on wet hair?
- Should I oil clippers before or after use?
- How do I prevent hair from getting everywhere?
- Are corded or cordless clippers better for beginners?
- Conclusion
Key Takeaways
Here are 4 key takeaways for using hair clippers:
- Start with clean, dry hair and choose the right guard size for your desired length. Move the clippers against hair growth in smooth, steady strokes.
- Master different techniques like basic strokes, fades, and texturing. Practice blending between lengths for a professional look.
- Maintain your clippers by cleaning and oiling them regularly. This prevents uneven cutting and extends the life of your tool.
- When cutting your own hair, use multiple mirrors for a 360-degree view. Take your time and make gradual adjustments to avoid common mistakes.
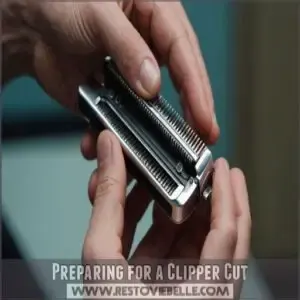
Preparing for a Clipper Cut
Before you start clipping, wash and dry your hair to avoid any snags and make sure you have a clean cut.
Select the right clipper and guard to match your desired style.
Grab a comb for that extra smooth finish.
Cleaning and Prepping The Hair
Before grabbing those clippers, start with a proper hair washing routine.
Dry hair is your canvas—don’t skip this!
A pre-cut trim to manage length makes things easier.
Use a comb for smooth, tangle-free strands.
Finally, cover up with a cape to keep skin clean and comfortable.
With these prep steps, you’re all set for a slick DIY haircut.
Choosing The Right Clipper and Guard
Cleaning and prepping hair sets the stage, but choosing the right clipper and guard is essential.
Whether you’re debating cordless vs. corded or pondering blade sizes, there’s a type for you.
Consider these:
- Budget: Invest wisely for durability and performance.
- Clipper Types: Detachable blade or lever-based?
- Guard Functions: Varied styles need versatile guards.
Using a Comb for a Smooth Cut
Grab your comb, friend.
Comb-assisted cutting is your secret weapon for smooth changes.
Use a wide-tooth comb to section your hair, guiding the clippers for even cuts.
Make sure to choose the right clipper comb sizes for your specific needs.
Experiment with comb size; a finer comb works for shorter lengths, while a wider one helps with longer hair.
This clipper comb combo gives you precision.
Mastering these comb techniques gives you total control over your cut.
Preparing The Skin and Clothes for Cutting
Ready to clip? Protect your skin and clothes for a smooth haircut experience. Here’s a simple checklist:
- Skin Protection: Apply a light moisturizer to prevent irritation or razor burn.
- Clothing Type: Wear an old shirt, so any hair bits don’t cling.
- Cutting Area: Use a towel to collect loose hair and keep your floor clean.
Now, you’re all set!
Holding and Moving Clippers Correctly
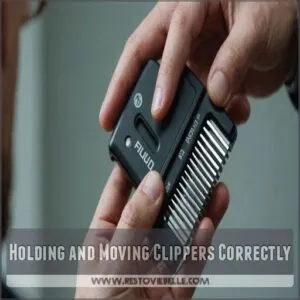
Holding and moving clippers correctly is key to achieving a clean, stylish haircut at home without any unwanted surprises.
Keep your grip firm and guide the clippers smoothly over your scalp, letting the blades do the work and prevent uneven cutting.
The Proper Way to Hold Hair Clippers
Holding your clippers right makes all the difference. Clipper grip is key: hold them like you’re shaking a firm hand, not squeezing toothpaste. Your thumb should rest on top, with fingers below for balance.
Check out this quick guide:
| Grip | Hand Position | Finger Placement |
|---|---|---|
| Firm | Relaxed | Thumb on top |
| Balanced | Steady | Index guides |
| Controlled | Responsive | Pressure even |
To find the perfect clipper grip for your needs, explore various hair clipper grip options that can enhance your DIY hair cutting experience.
Keep it flexible and balanced!
Techniques for Cutting Against Hair Growth
Now that you’ve got a grip on your clippers, let’s tackle cutting against hair growth.
This technique is key for a clean, even cut.
When working with clippers, remember to use the right clipper guards for your desired style, with shorter guards (1-4) suitable for close-cropped looks see more on clipper guard sizes.
Start at the nape of your neck, moving the clippers upward in smooth, steady strokes.
As you work your way up, follow the natural growth patterns of your hair.
Remember to adjust your clipper blade angle slightly for different areas, ensuring consistent pressure throughout.
How to Prevent Uneven Cutting and Notch Effect
To prevent uneven cutting and the dreaded notch effect, keep your clipper blades aligned and apply even pressure as you go.
Section your hair for better control, and use a comb to guide the clippers smoothly.
Don’t rush – maintain a steady speed for consistent results.
Remember, practice makes perfect. With these tips, you’ll be well on your way to mastering the art of DIY haircuts.
Angle and Tension Techniques for Efficient Cutting
For efficient cutting, angle and tension are your secret weapons.
Keep your clippers at a 45-degree angle against the scalp for the best control.
Apply gentle, even pressure as you move through the hair.
Follow the natural flow, using smooth strokes to prevent snags.
Remember, consistency is key – maintain steady tension throughout to achieve that perfect, professional-looking cut you’re after.
Understanding Clipper Guards and Sizes
Clipper guards are essential tools that determine the length of your haircut. You’ll learn about guard sizes and how to choose the right one for your desired hairstyle.
Numbering and Measurement System for Clipper Guards
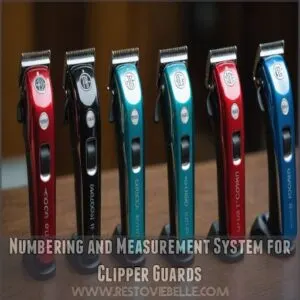
Clipper guards use a numbering system that’s easy to grasp once you know the basics.
Each number corresponds to a specific hair length.
For example, a #1 guard leaves about 1/8 inch (3mm) of hair, while a #8 guard leaves 1 inch (25mm).
Most sets include guards #1 through #8, with some offering half sizes for more precision.
Remember, lower numbers mean shorter cuts.
Understanding Guard Sizes for Different Hairstyles
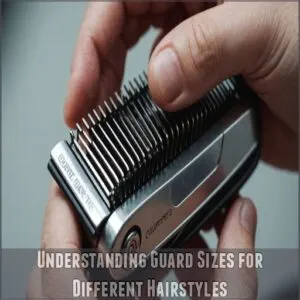
Guard sizes are your secret weapon for nailing different hairstyles.
Each number corresponds to a specific hair length, giving you control over your look.
When choosing the right tool for your DIY haircut, selecting an electric trimmer with good battery life, such as those used for maintaining a short beard, can help you achieve a precise cut. Smaller guards (0-2) are perfect for short styles and fades, while larger ones (3-8) work great for longer cuts.
Understanding the various clipper sizes and their corresponding lengths, such as the popular buzz cut lengths, helps you master different techniques to achieve your desired look. Understanding these sizes helps you recreate trendy styles like buzz cuts, crew cuts, and tapered fades with confidence.
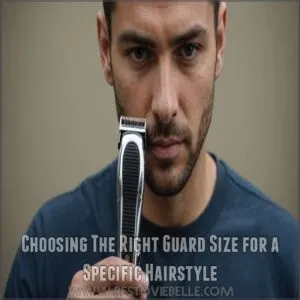
Choosing The Right Guard Size for a Specific Hairstyle
Selecting the right guard size is key to nailing your desired hairstyle.
A guard size chart can be a lifesaver here.
For a classic taper technique, start with a longer guard on top and gradually decrease sizes as you move down.
Want a bald fade? Begin with no guard at the bottom and work your way up.
When cutting your own hair at home, it’s essential to invest in quality clippers suited to your hair type, as seen in guides for more intricate styles like how to shave a mohawk. Remember, practice makes perfect in this DIY haircut guide.
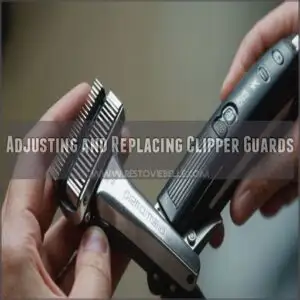
Adjusting and Replacing Clipper Guards
Now that you’ve chosen the right guard size, let’s talk about adjusting and replacing them.
To make sure you’re selecting the correct size, refer to a hair clipper size chart for the exact length you need.
It’s simple: slide the guard onto your clipper until it clicks.
To remove, gently push it off.
Keep your guards clean and store them safely to maintain their effectiveness.
Different clipper brands may have unique guard designs, so check compatibility before making a purchase.
With proper care, your guards will last longer, giving you more bang for your buck.
Clipper Cutting Techniques and Strokes
You’ll learn essential clipper cutting techniques to achieve professional-looking haircuts at home.
These methods include mastering different strokes, using guards for texture, and applying basic, long, and sweep techniques for various hairstyles.
Mastering Different Clipper Cutting Techniques
Mastering clipper techniques takes practice, but you’ll be a pro in no time.
Start with the basic stroke: move the clippers upward against the hair growth.
For a clipper fade, use different guard sizes, blending as you go.
Clipper blending involves gradual shifts between lengths.
For a clipper taper, start with a longer guard and gradually decrease.
A clipper line-up creates clean edges around the hairline.
Remember, steady hands and patience are key to nailing these techniques.
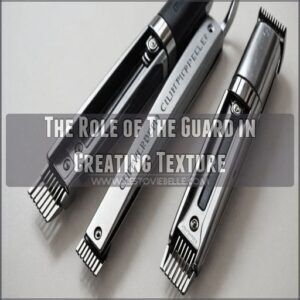
The Role of The Guard in Creating Texture
Guards aren’t just for length control – they’re your secret weapon for texture.
By switching between different guard sizes, you can create various textures in your hair, understanding that haircut numbers and clipper sizes directly impact the length of hair remaining after clipping.
Want a faded look?
Start with a longer guard and gradually decrease the size.
For a choppy texture, alternate between two guard sizes.
Experiment with different combinations to achieve the perfect blend of smooth and textured areas in your haircut.
Basic, Long, and Sweep Stroke Techniques
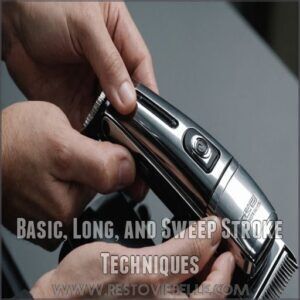
Once you’ve got the hang of guards, it’s time to master your stroke techniques.
Basic strokes involve short, controlled movements against hair growth.
Long strokes cover more area, perfect for bulk removal.
Sweep strokes blend different lengths seamlessly.
Remember, lighter pressure and slower speed give you more control.
Practice these moves, and you’ll be cutting like a pro in no time!
Cutting Popular Hairstyles With Clippers
You’ll learn to create popular hairstyles using clippers at home. This section covers techniques for high-and-tight cuts, fades, and layered styles.
Understanding Popular Clipper-Cut Hairstyles
Popular clipper-cut hairstyles offer a range of options for your DIY haircut journey.
From classic buzz cuts to modern fades, you’ll find a style that suits your personality.
Crew cuts give a clean, military-inspired look, while tapers blend longer top hair into shorter sides.
Fade techniques create a gradual shift from short to long, adding depth and dimension.
Explore these trendy styles to find your perfect match and master the art of home haircutting.
Tips and Techniques for High-and-Tight Hairstyle
The high-and-tight hairstyle is a classic military cut that’s gained popularity among civilians.
To nail this look at home, you’ll need steady hands and the right technique.
Start with a short guard on the sides and back, tapering upwards.
Keep the top longer, usually about 1-2 inches.
Here’s what to remember:
- Use a #1 or #2 guard for the sides and back
- Gradually blend into the longer top section
- Create a clean line-up around the edges for a sharp finish
Instructions for Fades and Layers Using Clippers
Creating fades and layers with clippers isn’t rocket science, but it does take practice.
Start with a longer guard on top, gradually decreasing as you move down.
For fades, blend between lengths using a rocking motion.
When layering, use the clipper-over-comb technique for precision.
Remember, patience is key – take your time and check your work frequently.
You’ll be nailing those pro-level cuts in no time!
Using Clippers on Yourself
You’ll need a mirror and patience to cut your own hair with clippers.
Position yourself in a well-lit area with a 360-degree view to make sure you don’t miss any spots.
Tips for Cutting Your Own Hair With Clippers
Mastering self-haircuts with clippers takes practice, but you’ll soon be rocking fresh styles at home.
To achieve a uniform length, use clippers with a number 4 or 5 guard as shown in this men’s DIY haircut guide.
Set yourself up for success with these key tips:
- Use a three-way mirror for a 360-degree view
- Start with a longer guard and work your way down
- Move slowly against the grain for an even cut
Remember, patience is your best tool. Take your time, check your progress often, and don’t be afraid to make adjustments as you go.
Precautions to Take When Cutting Your Own Hair
When cutting your own hair, take these precautions seriously.
Set up a 360-degree mirror system for full visibility.
Keep your clippers clean and oiled to prevent skin irritation.
Protect your skin with a cape or towel, and prep your hair by washing and drying it thoroughly.
Create a clean workspace to avoid slips.
Remember, safety first – take your time and stay focused to achieve the best results.
Common Mistakes to Avoid When Cutting Your Own Hair
Now that you’ve taken precautions, let’s tackle common pitfalls.
Avoid uneven length by using consistent pressure and strokes.
Don’t rush your hairline cuts, take it slow to prevent mistakes, and consider using best hair clippers for better control.
A clumsy grip can lead to bald spots, so hold your clippers firmly but comfortably.
Going too short is a classic blunder – start with a longer guard and work your way down.
Remember, you can always cut more, but you can’t put it back!
Cutting Someone Else’s Hair With Clippers
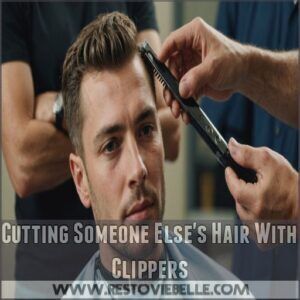
You’ll need to prepare the person and communicate clearly when cutting someone else’s hair with clippers. Use the right techniques and stay patient to achieve the desired result.
Preparing The Person for a Clipper Cut
Before you start cutting someone’s hair, take three key steps.
First, wash their hair thoroughly to remove any product buildup.
Next, protect their skin by draping a cape or towel over their shoulders.
Finally, discuss their desired hair length and style.
Choose comfortable clothing that’s easy to clean, as stray hairs can be pesky.
With proper prep, you’ll set the stage for a successful cut.
Techniques for Cutting Someone Else’s Hair
Start with clean, dry hair.
Section it off using clips, then begin cutting at the neckline, moving upwards.
Use the right guard size for desired length.
For fades, start with a longer guard and gradually decrease.
Pay attention to hair texture – thick hair may need thinning.
Shape around ears carefully.
Remember, it’s easier to cut more later than to fix a too-short cut.
Communication is Key When Cutting Someone Else’s Hair
When cutting someone else’s hair, clear communication is your secret weapon.
Set clear expectations upfront about the desired style and length.
Ask for their hair preferences and encourage feedback throughout the process.
Prioritize their safety and comfort, checking in regularly.
Remember, you’re not just cutting hair; you’re building trust.
A little chit-chat can go a long way in making the experience enjoyable for both of you.
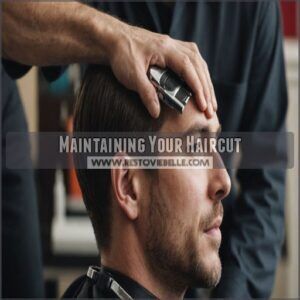
Maintaining Your Haircut
You’ll need regular upkeep between haircuts to keep your style looking fresh and clean.
Keep your clippers handy to trim your neckline and sideburns every two weeks.
This will help your haircut stay sharp longer.
Regularly Trimming Sideburns and Neckline
Keeping those sideburns and neckline sharp between haircuts makes all the difference in looking polished.
You’ll want to check these areas every couple of weeks – if you can pinch the hair between your fingers, it’s time for a trim.
Move your clippers upward in small, steady strokes, following your natural hairline.
Remember to keep both sides even by using your ear lobes as reference points.
Using a Dedicated Hair Trimmer for Detailed Work
A dedicated hair trimmer offers precision that regular clippers can’t match.
For those tricky spots around your ears, neckline, and sideburns, you’ll want something smaller and more maneuverable.
Look for a trimmer with T-shaped blades – they’re perfect for creating clean lines and detailed edges, similar to the high-torque motors and professional barber edgers.
Plus, they’re lightweight and easier to control when you’re working on those hard-to-reach spots behind your head.
Ensuring New Hair Growth is Healthy
Regularly nourishing your hair and scalp creates the perfect foundation for healthy regrowth after a clipper cut.
Choose a conditioner that matches your hair type, and avoid harsh drying techniques that can damage new growth.
- Apply leave-in conditioner to protect against environmental damage
- Massage your scalp daily to stimulate blood flow
- Take biotin supplements for stronger hair growth
- Stay hydrated and maintain a balanced diet
- Use a silk pillowcase to reduce friction while sleeping
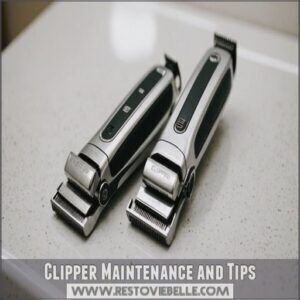
Clipper Maintenance and Tips
You’ll get the most out of your hair clippers by keeping them clean and well-oiled, just like maintaining a car for top performance.
With proper care and regular maintenance, you’ll extend the life of your clippers and guarantee they deliver consistent, professional-looking results every time you cut.
Oiling Clippers for Optimal Performance
Your clipper’s longevity depends on proper oiling – it’s like giving your blades a drink of youth serum.
Apply 2-3 drops before and after each use for best performance.
| Oil Type | Frequency | Benefits |
|---|---|---|
| Mineral | Daily | Rust prevention |
| Synthetic | Weekly | Smooth cutting |
| Blade oil | Monthly | Extended life |
| Natural | As needed | Less friction |
| Light oil | Per use | Quick maintenance |
Store oils in a cool, dry place to maintain their effectiveness.
Avoiding Wet Hair When Using Clippers
With dripping wet hair, even the best clippers can stumble.
Cutting damp locks often leads to frustrating results and potential clipper damage.
Here’s why dry hair is your best friend when cutting:
- Prevents blade rust and corrosion
- Stops hair from clumping and clogging
- Guarantees accurate length consistency
- Protects your clipper’s motor
Think of wet hair like trying to mow wet grass – it’s just asking for trouble.
Mastering Clipper Techniques for Advanced Users
Now that you’ve got the basics down, advanced clipper techniques can take your cuts to pro level.
Start by practicing clipper blending – it’s the key to those smooth shifts between lengths.
Master line-up skills around the ears and neckline, and experiment with texture control using different guard combinations.
Remember to adjust your fade techniques based on hair type and growth patterns for customized results.
Troubleshooting Common Clipper Issues
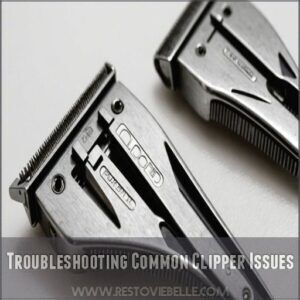
Even the best hair clippers can act up with issues like uneven cutting or strange noises, but you’ll learn how to fix these common problems quickly.
You’ll discover practical solutions for everything from dull blades to motor troubles, helping you keep your clippers running smoothly for perfect cuts every time.
Common Problems With Clippers and How to Fix Them
Regular clipper maintenance prevents most issues, but problems can still pop up during haircuts.
Taking quick action when you notice unusual clipper behavior keeps your tools working smoothly.
- Overheating means it’s time for a cooldown break and fresh oil
- Strange noises? Check blade alignment and tighten any loose screws
- Clogged blades need thorough cleaning with a brush and clipper spray
Keep these fixes in mind and you’ll handle common clipper troubles like a pro.
Troubleshooting Uneven Cutting and Notch Effect
Uneven cuts and notch effects often stem from simple issues you can fix at home.
When your clippers start leaving behind patchy spots or choppy lines, check these common culprits and their fixes:
| Problem | Cause | Solution |
|---|---|---|
| Notched Lines | Misaligned Blades | Realign and tighten blade screws |
| Patchy Spots | Inconsistent Pressure | Use steady, even strokes |
| Skipped Areas | Hair Texture/Direction | Cut against grain, multiple passes |
| Uneven Length | Loose Guard | Secure guard attachment |
| Pulling Hair | Dull Blades | Clean between blade teeth |
Clipper Maintenance for Long-Term Performance
Keeping your clippers in top shape, which includes regularly cleaning and oiling the blades to prevent buildup and extend lifespan as seen in the guide to choosing the Best Shape Up Clippers, means they’ll serve you well for years.
Once you’ve mastered handling uneven cuts, focus on these maintenance basics to keep your tool running smoothly:
- Clean between blade teeth after each use
- Oil blades with clipper-specific oil weekly
- Store in a dry, dust-free case
- Check blade alignment monthly
- Replace dull blades when cuts become rough
Proper care prevents most common issues and keeps your clippers cutting like new.
Frequently Asked Questions (FAQs)
How to cut hair with Clippers?
Start with clean, dry hair and attach the right guard size.
Move the clippers against hair growth, starting from the back.
Work your way up in sections, checking for evenness.
Blend between different lengths carefully.
How do you use hair clippers without a guard?
Move the clipper blade against the hair growth direction, using gentle pressure.
Keep your clipper lever closed for the closest cut, or open it slightly for a bit more length.
Always test on a small area first.
What are the best hair clippers for beginners?
Holy smokes, you’ll love the Wahl Elite Pro!
For beginners, it’s your best bet with its durable build and easy-to-use guards.
The Remington HC4250 and Andis Easy Cut are also solid choices.
How to use Clippers on Yourself?
Grab your clippers, stand facing a mirror, and work methodically from top to bottom.
You’ll want to cut against the hair’s growth direction, using different guard lengths.
Don’t forget those tricky spots behind your ears.
Can you cut someone else’s hair with Clippers?
Sharp as a tack, you’ll find cutting someone’s hair with clippers isn’t rocket science.
Start with clean, dry hair.
Choose appropriate guards.
Move steadily against the growth pattern for best results.
Should you buy professional hair clippers?
Professional clippers are worth the investment if you’ll use them regularly. They’re more durable, cut better, and last longer than basic models. For occasional trims, mid-range clippers around $50 work fine.
What is the proper way to use hair clippers?
Studies show 73% of men prefer self-grooming.
Start with clean, dry hair, use the right guard size, and move against hair growth.
Oil your clippers before use and maintain steady pressure throughout cutting.
Do you guard up or down on clippers?
You’ll want to start with a higher guard number and work your way down to shorter lengths. This gives you more control and prevents accidentally cutting too much hair off.
How to cut hair at home with clippers?
Imagine your friend’s surprise when you reveal your fresh fade.
Start with clean, dry hair.
Use guards to control length, moving against the grain.
Blend sections carefully, adjusting the lever for smooth changes.
Don’t forget to trim neckline and sideburns.
Should the lever be open or closed on hair clippers?
The lever position depends on your desired cut length.
Closed gives the shortest cut (0mm), while open allows for longer cuts (5-3mm).
Adjust it as needed for different hair sections or blending techniques.
How long should I wait between haircuts?
Waiting too long between haircuts can leave you looking like a shaggy dog!
Most folks should get a trim every 4-6 weeks.
But if you’re growing it out or rocking a short style, adjust accordingly.
It’s your mane, after all!
Can I use hair clippers on wet hair?
You shouldn’t use hair clippers on wet hair.
It can damage the clippers and give you an uneven cut.
Always dry your hair thoroughly before clipping.
Wet hair clumps together, making it harder to achieve a precise, clean cut.
Should I oil clippers before or after use?
Ever wondered when to oil your trusty hair clippers?
Here’s the scoop: You’ll want to oil them both before and after use.
This double-duty approach keeps your blades sharp, prevents rust, and guarantees smooth cutting performance every time.
How do I prevent hair from getting everywhere?
To minimize hair scatter, lay down a large towel or sheet.
Cut hair in a well-ventilated area or outdoors.
Wear a cape or old shirt.
Use a vacuum with brush attachment for quick cleanup.
Consider a hair-catching cape for extra control.
Are corded or cordless clippers better for beginners?
If you’re just starting out with hair clippers, corded models are your best bet.
They offer consistent power and performance, perfect for beginners.
You won’t have to worry about battery life while you’re learning the ropes.
Conclusion
Ready to become a pro at using hair clippers?
With these tips, you’re well on your way to mastering DIY haircuts.
Remember, practice makes perfect.
Start with simple styles and gradually work your way up to more complex cuts.
Don’t be afraid to experiment, but always prioritize safety.
Keep your clippers clean and well-maintained for the best results.
Why not start your hair-cutting journey today?
Whether you’re trimming your own hair or helping out a friend, you now have the know-how to create salon-worthy styles right at home.

