This site is supported by our readers. We may earn a commission, at no cost to you, if you purchase through links.
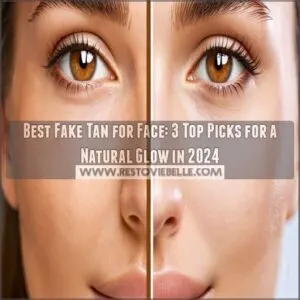
 Want to nail the perfect sun-kissed glow without the sun damage? You’re in the right place.
First, exfoliate your face gently with an oil-free scrub, focusing on dry areas like your cheeks and nose. Cleanse your skin and apply an oil-free moisturizer to your dry spots. When you’re ready to tan, use a face-specific formula, applying it in gentle, circular motions with an application mitt or your hands. Don’t forget to blend around your hairline and jaw to avoid harsh lines.
There you have it – a simple guide to achieving a flawless facial tan.
Table Of Contents
- Key Takeaways
- Preparing Your Face
- Choosing the Right Tanner Shade
- Proper Face Tanner Application
- Applying Tanner Around the Face
- Contouring With Self-Tanner
- Perfecting Facial Tan Blending
- Setting Your Face Tanner
- Overnight Face Tan Development
- Maintaining Your Face Tan
- Refreshing Your Facial Tan
- Frequently Asked Questions (FAQs)
- How do you Tan a face?
- How does coconut milk help remove tan?
- When should you self tan your face?
- How do I choose the right self tan for my skin tone?
- How do you tan your face effectively?
- What can I use to self-tan my face?
- Is it good to put fake tan on your face?
- Do you moisturize before self tanning face?
- How long does a self-tan last?
- How often can I reapply self-tanner?
- Can I use self-tanner on my face every day?
- Can I use a face self-tanner on my body?
- Can I use a body self-tanner on my face?
- Conclusion
Key Takeaways
- Prep is key: Exfoliate and hydrate your face before tanning to create a smooth canvas. Go easy on sensitive skin and skip harsh products like retinol right before tanning.
- Choose the right shade: Pick a self-tanner that enhances your skin tone. Go for a gradual tan product if you’re new to self-tanning. Match your undertones – warm undertones pair well with golden or olive hues, while cool undertones look great with ashy or violet undertones.
- Application is everything: Opt for face-specific formulas and apply with an application mitt or your hands in gentle, circular motions. Don’t forget to blend around your hairline and jaw for a seamless finish.
- Set and maintain your tan: Lock in your tan by dusting a light layer of translucent powder over your face. Keep your skin moisturized to extend the life of your tan and avoid exfoliating too frequently, as this can speed up fading.
Preparing Your Face

You know the drill: prep work is key. Exfoliating and hydrating set the stage for a seamless self-tan. But on your face, there’s a twist. You’ve got to be extra gentle. Think of it like prepping a canvas for a masterpiece.
Go easy on your skin a day before tanning. Skip the harsh scrubs and opt for a gentle exfoliant. This sweeps away dead skin cells without irritating your face. It’s a subtle step, but it makes a huge difference in the final look.
And remember, your face is unique. So, skip the retinol and exfoliating serums right before tanning. These can mess with the self-tanner’s magic, leaving you with a less-than-desirable finish.
Choosing the Right Tanner Shade

Picking the right shade of self-tanner is key to getting a natural, glowing complexion. You want a shade that enhances your skin tone, not one that makes you look like an Oompa Loompa.
Skin Tone
Now that you’ve prepped your face, it’s time to talk about choosing the right shade for your skin tone. This is a key step to achieving a natural-looking glow-up. Here’s a quick guide:
- Go for a Gradual Glow: If you’re new to self-tanning, start with a gradual tan product. These are usually lightweight lotions or creams that build up color over a few days, giving you more control over the final shade.
- Match Your Undertones: Just like with foundation, you want to factor in your skin’s undertones when choosing a self-tanner. If you have warm undertones, look for a tanner with golden or olive hues. If you have cool undertones, opt for a tanner with ashy or violet undertones.
- Avoid the Orange: Steer clear of self-tanners with overly red or orange hues, unless you’re going for a specific look (like a sun-kissed beach babe). These shades can often look unnatural, especially if you have fair skin.
Product Type
Picking the right self-tanner formula is key to getting that natural-looking glow. There are tons of options out there, each with its own perks. Here’s a table to help you figure out which type of self-tanner is your best match:
| Product Type | Description | Best For |
|---|---|---|
| Mousse | Lightweight, fast-drying formula | Quick, even application |
| Self-Tanning Drops | Concentrated pigment, add to moisturizer | Customizable depth of tan |
| Gradual Self-Tanning Lotion | Moisturizing, builds colour over time | Subtle, natural-looking tan |
Ingredients
There are a few key ingredients to watch out for. The first is DHA (dihydroxyacetone), which is the active ingredient that interacts with your skin to create that sun-kissed glow. Opt for naturally derived DHA whenever possible, as it tends to produce a more natural-looking tan.
Another ingredient to keep an eye out for is hyaluronic acid, a hydrating hero that helps to lock in moisture and keep your skin feeling plump and supple. This is especially important if you’re prone to dry skin, as it’ll help make sure your tan goes on smoothly and evenly.
Tanning water has become increasingly popular, offering a light and way to achieve a natural glow. It’s perfect if you’re new to self-tanning, as it’s easy to apply and often packed with skin-loving ingredients.
Proper Face Tanner Application

Now that you’ve chosen the perfect shade, it’s time to get into the application process. Proper face tanner application is key to achieving a natural, streak-free glow. Here’s a step-by-step guide to help you nail your facial tanning routine:
- Use the right formula: Opt for a self-tanner specifically designed for the face. These formulas are usually lighter and non-comedogenic, which means they won’t clog your pores.
- Apply with care: Start by cleansing and exfoliating your skin. Then, using a tanning mitt or latex gloves, apply the self-tanner in a downward motion, working from the hairline down to the neck and ears.
- Blend, blend, blend: Make sure to blend the product evenly around your face, paying extra attention to the hairline, neck, and ears to avoid any tell-tale signs of self-tanning.
- Contour with confidence: Want to add a little extra definition? Use a small amount of self-tanner on a makeup brush or your fingers to contour your cheekbones, jawline, and brow arches.
With these tips in mind, you’re well on your way to becoming a self-tanning pro, achieving a natural-looking glow that’ll have everyone asking for your secret.
Applying Tanner Around the Face

Now, let’s tackle the areas around your face. You want to make sure there’s a smooth blend where your face meets your hairline, neck, and ears. Here’s how to do it like a pro:
- Hairline Blend: Work the product into your hairline using gentle, sweeping motions. Go with the direction of your hair growth to avoid any unsightly lines or streaks.
- Neck and Décolletage: Blend the product down your neck and onto your décolletage (that’s a fancy word for your collarbone area). This creates a natural flow and avoids any tell-tale tan lines.
- Ear
Contouring With Self-Tanner

Contouring with self-tanner is a great way to enhance your features and give your face a natural-looking glow. Here’s the lowdown on how to contour like a pro and take your self-tanning game up a notch.
When it comes to contouring, it’s all about playing with light and shadow to define your best angles. By applying self-tanner to certain areas of your face, you can create the illusion of higher cheekbones, a slimmer jawline, or a more defined brow bone. It’s like sculpting your face with a sun-kissed glow!
The key to successful contouring is to choose the right areas to apply the self-tanner. Here’s a breakdown of where to focus:
- Cheekbones: Sweep the self-tanner along the hollows of your cheeks, blending upwards in the direction of your temples. This will give the illusion of higher cheekbones and a more defined face shape.
- Jawline: If you want to create a more chiselled look, apply the self-tanner along your jawline, blending downwards. This will give the appearance of a slimmer, more defined jaw.
- Brow Arches: To lift and define your eyes, apply a small amount of self-tanner along your brow arches, blending upwards.
Perfecting Facial Tan Blending

Now, let’s talk about blending that tan seamlessly into your skin. You don’t want any harsh lines or streaky patches—just a natural, sun-kissed glow. So, here are some tips to perfect your facial tan blending technique:
- Use a brush: For the most flawless blend, a brush is your best friend. Opt for a soft, dense brush, like a kabuki brush, to buff the product into your skin. This helps distribute the self-tanner evenly and prevents any tell-tale streaks.
- Blend, blend, blend: Take your time and blend, blend, blend! Use circular motions with your brush to really work the product into your skin. Pay extra attention to the edges of your face, your hairline, and your neck to avoid any obvious tan lines.
- Avoid common mistakes: One of the biggest mistakes people make is forgetting to blend their ears and the back of their neck. Don’t skip these areas! Blend the self-tanner down your neck and behind your ears to make sure you have a smooth finish.
- Petroleum jelly to the rescue: If you’re nervous about over-applying or blending too close to sensitive areas, like your eYes or mouth, use a small amount of petroleum jelly as a barrier. Apply it to these areas before you start tanning, and the self-tanner won’t stick to those spots.
Setting Your Face Tanner

Now that you’ve perfected the blend, it’s time to set your face tanner for a long-lasting glow. Here are some tips to lock in that tan:
- Powder Power: Gently dust a light layer of translucent powder over your face. This will help absorb any excess moisture and set the tanner, reducing the chances of transfer onto your bedding or clothes.
- Blow Dry: If you’re in a hurry and need an instant set, grab your blow dryer. Set it to the coolest setting and gently blow dry your face. The gentle stream of cool air will help speed up the drying and setting process.
- Patience Pays Off: While it may be tempting to rush through the process, giving your face tanner ample time to set is key. Let it sit for at least 15-20 minutes before getting dressed or jumping into bed. This waiting game helps your tan develop evenly and reduces the risk of streaking or smudging.
Overnight Face Tan Development

Now, it’s time to let your tan develop overnight. This is where the magic happens while you sleep! But first, there are a few things to keep in mind to make sure you wake up with a flawless, natural glow.
- Sleep tight: Get a good night’s rest and let your tan develop undisturbed. Avoid tossing and turning too much, as this can cause your tan to crease or smudge.
- Designated bedding: Consider sleeping on a towel or using designated bedding. This will prevent any transfer of the self-tanner onto your regular sheets.
- Set it and forget it: Before you hit the hay, make sure your face tan is set. You don’t want it to rub off on your pillow or bedding. A quick dusting of translucent powder will do the trick.
- Wake up and glow: In the morning, gently wash your face with a mild cleanser to remove any residue. Voila! You’ll be greeted by a beautiful, sun-kissed complexion.
Maintaining Your Face Tan
Now that you’ve achieved the perfect sun-kissed glow, let’s talk about keeping it that way. Face tans tend to fade faster than body tans due to the higher cell turnover in the delicate facial skin. But don’t worry, with a few simple tips, you can extend the life of your tan and keep that radiant look for longer.
- Glow upkeep: Moisturize, moisturize, moisturize! Keeping your skin hydrated is key to maintaining your tan. Opt for an oil-free moisturizer to avoid breaking down the tan too quickly.
- Wash hands: After applying self-tanner, remember to wash your hands thoroughly to avoid any unwanted staining.
- Keep skin moisturized: Moisturize daily to lock in that glow. Using a moisturizer with hydrating ingredients will help extend the life of your tan, but will also keep your skin happy and healthy.
- Avoid exfoliation: While exfoliation is key to achieving an even tan, it’s important to avoid exfoliating too frequently as this can speed up the fading process.
- Sun protection: Don’t forget the sunscreen! When spending time outdoors, protect your skin with a moisturizing sunscreen to prevent sun damage and maintain your tan.
Refreshing Your Facial Tan
So, your tan is fading, and you want that glow back. No sweat! Keeping your facial tan looking fresh is a cinch and can be done in a few simple steps.
First, grab an exfoliating scrub and gently buff away any remaining tanner. This creates a smooth canvas for your next application. Next, hop in the shower and use a mild body cleanser to wash away any scrub residue. Once you’re done, pat your face dry with a soft towel. Time to reapply! Grab your tanning mitt or latex gloves, and don’t forget to secure your hair with a hair tie to avoid any tan transfer. Follow the same application steps as before, blending the product evenly onto your face, neck, and ears. Remember to pay extra attention to your hairline and jawline to avoid any tell-tale signs of unevenness.
And there you have it! You’re now a pro at maintaining and keeping your facial tan looking fresh.
Frequently Asked Questions (FAQs)
How do you Tan a face?
Prep the night before by exfoliating and moisturising. Apply tanner evenly to your face, blending into your hairline, ears, and neck. Dot onto sun-hit areas like your nose, chin, cheeks, and forehead. Allow it to develop overnight.
How does coconut milk help remove tan?
Coconut milk is a skincare treasure, rich in vitamin C and mild acids that fade tan lines. Apply it to tanned areas for 20-30 minutes, then rinse. It’s a natural, effective way to treat your skin.
When should you self tan your face?
The best time to self-tan your face is in the evening, so the product can develop overnight. Start by exfoliating and cleansing the day before, then moisturize.
How do I choose the right self tan for my skin tone?
Ditch the drab and embrace the fab! Go for a darker shade to deepen your complexion, or a light one for a subtle glow. Don’t forget to check your undertones and pick a product that suits your skin’s natural hue.
How do you tan your face effectively?
To tan your face effectively, use a formula designed for the face. These self-tanners are lighter and non-comedogenic. Avoid harsh ingredients and opt for gentle exfoliants. Skip retinol and exfoliating serums.
What can I use to self-tan my face?
A sunkissed glow without the sun’s rays."
For a flawless, natural-looking tan, use tanning drops, mists, or lotions. Beginners should opt for gradual tanners, while experts can try tanning waters or serums.
Is it good to put fake tan on your face?
It’s totally fine to fake tan your face. But, you might want to use a specific face tanning product. Your face fades faster than your body, so you’ll need to top it up more often.
Do you moisturize before self tanning face?
Yes, moisturising before self-tanning can help you achieve an even, streak-free tan. It also helps the colour last longer, as the tan penetrates deeper into moisturised skin. But remember, it’s not a necessity.
How long does a self-tan last?
It depends on your skin type, the tanner, and your skincare routine. Self-tans typically last 4 to 6 days, but can fade faster if you don’t prep and care for your skin.
How often can I reapply self-tanner?
You can reapply self-tanner to your face and hands every three to four days. For the rest of your body, you can reapply weekly, or every five to six days if you want to maintain your glow.
Can I use self-tanner on my face every day?
You might want to hold your horses. Self-tanner on your face won’t last as long as the rest of your body, but dermatologists warn that it can cause premature ageing, wrinkles, and skin laxity. So, proceed with caution.
Can I use a face self-tanner on my body?
You can use a face self-tanner on your body, but it mightn’t be as effective as a body self-tanner. Face tanners are formulated to be gentler on the skin, so they may not give you the same depth of colour as a body tanner.
Can I use a body self-tanner on my face?
The skin on your face is sensitive, so a body self-tanner might irritate it. If your skin isn’t sensitive, you can use a body self-tanner, but dilute it with moisturiser first.
Conclusion
You’re all set to self-tan your face like a pro and achieve that perfect sun-kissed glow.
Just remember to exfoliate, choose the right tanner shade, apply it gently and blend, blend, blend!
With these steps, you’ll be rocking a natural, flawless tan that’ll have everyone wondering if you just got back from a tropical vacation.
So, go ahead and give it a try, and don’t be afraid to experiment until you find what works best for your skin tone and desired look.
Happy tanning!