This site is supported by our readers. We may earn a commission, at no cost to you, if you purchase through links.
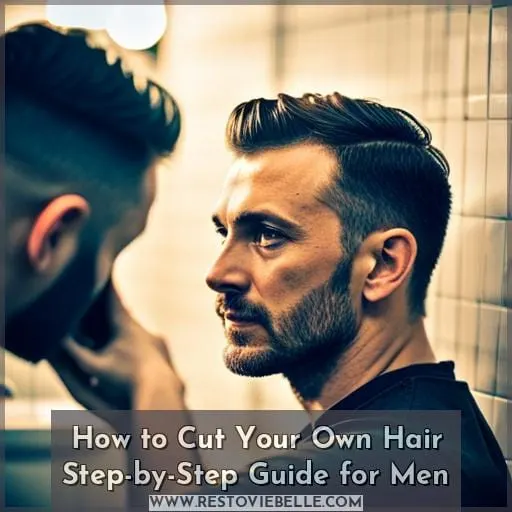 Sup fellas, it’s your barber buddy back again to drop some knowledge bombs about cutting your own hair. I know it seems daunting, but have no fear – this step-by-step guide’s got you covered. We’ll walk through everything from getting the right tools to setting up your space so you can DIY that fresh cut.
The key is taking it slow, having a plan, and following the steps. I’ll break it down for you so you can unlock your inner barber.
You got this! Whether it’s to save some dough or embrace your independence, learning how to cut your own hair is totally doable. We’ll focus on beginner techniques for shorter men’s styles so you can get styling.
Ready to elevate your grooming game and say see ya later to shaggy locks? Let’s do this!
Table Of Contents
- Key Takeaways
- Prepare Your Workspace
- Wash and Dry Your Hair
- Trim the Sides and Back
- Define the Outline
- Review and Refine
- Style and Finish
- Practice Makes Perfect
- Consult Your Barber
- Embrace the Buzzcut
- Frequently Asked Questions (FAQs)
- What clipper guards should I use for different hair lengths? For a crew cut use #4, for longer hair on top use #6-8, and for close sides/back use #1- Adjust as needed.
- How do I clean my clippers after cutting my hair? Remove any loose hairs, then wipe the blades carefully with a small brush or cloth. Use clipper oil or spray as needed.
- Conclusion
Key Takeaways
- Use clipper guards to establish a smooth foundation, blending and tapering the sides and back.
- Define clean lines around the ears, sideburns, and neckline with precision trimming.
- Style and finish the cut with products like pomade, wax, or hairspray.
- Embrace buzzcuts and experiment with different styles, as hair regrows if mistakes happen.
Prepare Your Workspace
When it comes to cutting your own hair at home, preparation is key for achieving the best results. First, be sure to gather the proper tools like quality clippers, guards, scissors, combs, and mirrors so you’ll have everything you need close by.
Next, set up an uncluttered area with good lighting and a chair, then put a towel around your shoulders to catch any loose hairs. With the right tools and workspace ready, you’ll be well on your way to DIY haircutting success.
Get the Right Tools
You’d better grab that doggone Wahl trimmer and guard comb quick before your mop gets any shaggier, homeboy. Them clippers are your new best friend for getting a clean cut without leaving the casa. Make sure you go top of the line with adjustable guards to get that fade on point.
A few tools and some elbow grease’ll have you stuntin’ like a pro-barber in no time. Just follow the lines with precision, keep it tight on the sides, and fade it up proper. With the right gear, cutting your own hair is a cakewalk if you take it slow and trust the tools.
You’ll be fresher than a barbershop shave when you’re done.
Set Up Your Area
Before styling, sweep up the area and cover surfaces to maintain neatness. Set yourself up like a professional barbershop. Clear clutter and cover counter space with a clean cape to collect trimmings. Position a well-lit mirror at eye level when standing.
Place your tools within easy reach on a sanitized tray – hair clippers, guards, scissors, comb, trimmers. Adjust your chair for comfort and posture. Use a hand mirror to check the back of your head. Stay focused, and you’ll achieve the clean cut and fade you desire in the comfort of home while social distancing.
Wash and Dry Your Hair
After setting up your workspace, comb through your hair thoroughly to remove any knots or tangles before washing.
When shampooing, focus the lather on your scalp and roots rather than the lengths. Rinse thoroughly with cool water to close the cuticle and promote shine. Pat dry with a towel, taking care not to overly rough up the strands.
For cutting, it’s ideal to have damp rather than fully dry hair. This allows you to see the natural fall of your hair and achieve the intended style.
Follow these tips when towel drying:
- Gently blot hair instead of rubbing vigorously.
- Wrap hair in a microfibre towel or old t-shirt rather than terrycloth.
- Let hair partially air dry before final towel dry.
- Avoid harshly twisting or wringing strands.
- Pat your hair totally dry before cutting for maximum control.
Proper washing and thorough drying allows for precise, intentional cutting when you DIY your next haircut at home.
Trim the Sides and Back
Looking to touch up your hairstyle at home? Start by combing your hair straight down to lift it away from your head. Then, use clippers with a number 4 or 5 guard to trim the hair to a uniform length, beginning at your temples and curving up and around the back of your head in even, smooth strokes.
Move slowly, and use a hand mirror to clearly see the back. This will establish a foundation for blending the sides and back.
Trim the Sides
Next, comb the sides away as you follow the curve of the head with a trimmer on guard four. Shape the sideburns using the corner edges of the clipper blade. Taper the area above the ear using a lower guard setting, curving up and out.
For neat hairlines, use the trimmer without a guard. Experiment with high and low fades.
| Guard Size | Hair Length |
|---|---|
| #1 | 1/8 inch |
| #2 | 1/4 inch |
| #3 | 3/8 inch |
| #4 | 1/2 inch |
| #5 | 5/8 inch |
The sides and back form the foundation. Master clean tapering and experiment with high and low fades to frame your style.
Trim the Back
Face the music as you shape up the back of your dome. Get a bird’s-eye view with a handheld mirror to navigate a clean neckline. Start high and work your way down gradually, curving trimmer motions inward for a natural look.
The nape can be tricky business, so go slowly with ample visibility to avoid haphazard hack jobs on your fine threads, my friend. Master the angles, trust your technique, and shape up a fresh fade with patience and precision.
Blend With Fading
You’ll want to use a shorter guard when fading the sides and back to gradually taper the length. For instance, start with a #4 guard on the sides, then use a #2 halfway up the head for a smooth fade. Take your time with fading techniques, using different clipper guards to blend hair textures and lengths.
Focus on precision around sideburns and ears, curving the trimmer to match the shape of your head.
Define the Outline
After trimming the sides and back, it’s time to define the outline. This takes precision and a steady hand.
- Use your trimmer without a guard. This allows you to cut super close and define lines. Start by outlining your sideburns. Trim them straight down or taper them in towards the ear.
- Next, define your neckline. Tilt your head forward and trim upward from the nape of your neck to your desired length. A lower neckline is more conservative, while a higher one modernizes your style.
- Fade down from your sideburns towards your neckline. Use lever adjustments to taper your trimmer guard size.
- For finishing touches, detail the hairline across your temples, over your ears, and around your sideburns.
Your goal is a polished shape with clean lines. Perfecting the details takes practice, so don’t worry about mistakes. Your outline will sharpen with time. Styling product boosts definition after cutting.
- Temple fade
- Crisp sideburns
- Lower neckline
- Higher fade
- Detail finishing
Review and Refine
Hey man, let’s do a final check for any stray hairs or imperfections. Look closely around your sideburns, temples, and hairline. Blend and lightly trim any spots that need it. We’re in the home stretch now, so take your time and refine the cut.
Check for Strays
Lean in close to the mirror and scan all around, double-checking for any stray hairs you may’ve missed – like that sneaky one curling up around your ear. Give your noggin a full inspection, brother. Missed patches stick out like a sore thumb.
Let your eyes hunt for grooming imperfections. Look for uneven spots or lengths begging to be snipped. Do a thorough stray hair inspection after each cut. Don’t quit before you’re satisfied.
Regular haircuts are a luxury denied to us cabin fever gents. But luckily, a precise self-haircut is within your grasp if you sharpen your skills. Take pride in your handiwork, but own your snafus too. Laugh at your mistakes and you rob them of their power.
Hair grows back, after all. A good self-cut shows patience and care. So keep at it.
Blend as Needed
Once finished, carefully inspect the cut and blend any uneven areas with light strokes.
- Check around the ears, neckline, and sideburns for stray hairs and blend with small clipper strokes if needed.
- Use a detail trimmer to define lines around ears, neck, and facial hair for a clean finish.
- For longer styles, point cut with shears to remove any uneven sections and blend layers.
With some practice and blending of uneven spots, you’ll be trimming your hair at home like a pro. Experiment with different looks by using clipper guards. And if you make a mistake, let it grow and try again next time.
Style and Finish
You’re all set. Now style your ‘do and – voila! – you’ll look sharp with a fresh self-cut! Here are my top tips for putting on the finishing touches:
Textured Messy – Sea Salt Spray – Scrunch into damp hair and air dry for beachy waves
Slicked Back – Pomade or Gel – Apply to dry hair and brush back for a polished look
Natural Volume – Mousse – Apply to roots and scrunch for extra lift
After cutting your own hair, maintain your fresh style with a solid haircare routine. Shampoo and condition regularly. Use leave-in treatments to boost shine and hydration. A few styling products like wax, pomade, or hairspray will help you achieve a polished, professional look every day.
With the right tools and techniques, you can master cutting and styling your hair at home.
Practice Makes Perfect
Try cutting your own hair a few times to get comfortable. With practice, you’ll gain confidence and improve your technique.
- Start with a longer guard setting and trim conservatively until you get the hang of it.
- Don’t be afraid to make mistakes – hair grows back! Use styling product to mask any unevenness.
- Experiment with different fade lengths and styles to expand your skills. A skin fade versus a high taper fade will require different techniques.
The more you cut your own hair, the more adept you’ll become. You’ll learn how your hair grows and how to work with your natural texture and growth patterns. Don’t expect perfection right away. Be patient with yourself as you develop this useful skill.
Consult Your Barber
Since your barber’s seen your hair from every angle, they’ll spot what you’ll miss.
Consulting your barber can help you avoid common mistakes and get pro tips for cutting your own hair at home. Reach out and schedule a video call to review your current style. Ask for their expert advice on the tools, techniques, and products that will work best for you.
| Consultation Questions | Tips from Your Barber |
|---|---|
| What sections do I need to focus on? | They’ll point out your growth patterns and problem spots. |
| How short should I go? | They’ll recommend guard sizes to match your style. |
| What products do you recommend? | They’ll suggest styling products to enhance your cut. |
With your barber’s guidance, you’ll gain confidence, avoid disasters, and achieve an empowering DIY haircut. Thank them for their time and support during this difficult period—it makes a difference! Though not ideal, cutting your own hair can be a rewarding experience with a little help from the pros.
Embrace the Buzzcut
If it goes awry, rock a buzzcut ’til it grows back.
- A buzzcut showcases your face shape and features.
- Exudes an effortlessly cool, minimalist vibe.
- Ultra low-maintenance hair – just wash and go!
- Saves time and money on haircuts.
- Makes you feel refreshed with an edgy new look.
Going for the buzz is liberating. Lean into the freedom of sporting close-cropped hair. Revel in that just got a clean haircut feel every day. Short hair, long on confidence.
Buzzcuts are the perfect pandemic hairstyle when you can’t get to the barbershop. Embrace your inner maverick and take style cues from soldiers, athletes, and leading men. Own your look. A buzzcut says you’re adaptable and unflappable in the face of a haircut gone wrong.
Frequently Asked Questions (FAQs)
What clipper guards should I use for different hair lengths? For a crew cut use #4, for longer hair on top use #6-8, and for close sides/back use #1- Adjust as needed.
For a short crew cut, go with a #4 guard. For longer hair on top, try a #6-8 guard. And for a close trim on the sides and back, use a #1 or #2 guard. Start with those guidelines, then adjust the lengths as needed to get the style you want.
How do I clean my clippers after cutting my hair? Remove any loose hairs, then wipe the blades carefully with a small brush or cloth. Use clipper oil or spray as needed.
After cutting, hold the clippers upside down and brush away loose hairs. Gently wipe the blades with a soft cloth, then apply a small drop of clipper oil. Don’t soak the blades or you’ll have an oily mess. With proper care, your clippers will stay sharp for the next cut.
Conclusion
Cutting your own hair can seem scary, but with the right tools, prep, and technique, you can get a fresh cut without leaving home. With practice and patience, you’ll be styling those clippers like a pro barber in no time.
Remember, hair grows back – so have fun trying out a new look! The key is to go slow, follow the steps, and check as you go.

