This site is supported by our readers. We may earn a commission, at no cost to you, if you purchase through links.
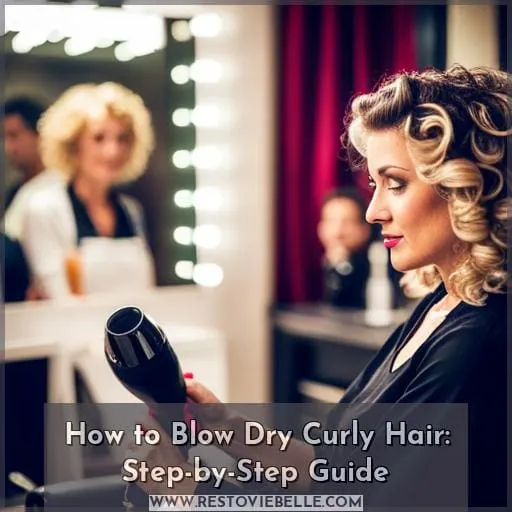 Looking to achieve a fabulous blowout on your curly hair? You’re in the right place! With our step-by-step guide, you’ll learn all the tips and tricks for getting salon-worthy results at home.
Did you know that using a diffuser attachment can help reduce frizz and enhance your natural curl pattern? We’ll also show you how to properly protect your hair from heat damage and finish off with beautiful, bouncy curls.
Get ready to rock those gorgeous locks!
Table Of Contents
Key Takeaways
- Use a diffuser attachment with wide prongs to evenly distribute heat and define curls
- Apply a thermal heat protectant before blow drying to safeguard hair from heat damage
- Partially air dry first for moisture retention and frizz control
- Finish with a serum or oil to enhance shine, smoothness, and help seal ends
Essential Tools for Blow-Drying Curly Hair
To achieve the best results when blow-drying curly hair, it’s essential to have the right tools.
Two important tools for blow-drying curly hair are a ceramic or tourmaline blow dryer and a diffuser attachment.
A ceramic or tourmaline blow dryer helps minimize frizz and promotes a shinier finish, while a diffuser attachment enhances curl definition and reduces frizz.
Ceramic or Tourmaline Blow Dryer
You’ll want to invest in a ceramic or tourmaline blow dryer for optimal results when blow-drying your curly hair.
Ceramic blow dryers distribute heat evenly and help retain moisture, while tourmaline blow dryers emit negative ions that reduce frizz and enhance shine.
Pairing either of these options with a diffuser attachment will further define your curls and prevent heat damage, giving you the best possible outcome for styling your curly hair.
Diffuser Attachment
Use a diffuser attachment to enhance your curly hair’s shape, definition, and reduce frizz.
The diffuser benefits curly hair by distributing heat evenly and gently drying the curls without disturbing their natural pattern.
When selecting a diffuser attachment for your blow-dryer, ensure it fits securely and has wide prongs to cradle the curls.
Experiment with different styling techniques to achieve maximum curl definition while protecting your hair from excessive heat damage.
Preparing Your Hair
Before you begin blow drying your curly hair, it’s crucial to properly prepare it.
- Deep conditioning is essential to replenish moisture and minimize damage from heat styling.
- Detangling your hair after conditioning will help reduce tangles and make the blow drying process smoother.
- Lastly, protecting against dry heat by applying a thermal heat protectant will ensure that your curls stay healthy and hydrated throughout the blow dry process.
Deep Conditioning
To prepare your hair for blow drying, start by deep conditioning it with a moisturizing treatment.
- Improved moisture retention
- Enhanced detangling
- Protection of the hair strand cuticle.
Detangling
Before blow drying your curly hair, detangle your locks for a smooth and manageable styling process.
Use a wide-tooth comb on wet hair to prevent breakage and distribute products evenly.
Take your time to gently remove knots and tangles without causing damage.
Protecting Against Dry Heat
After detangling your curly hair, protect against dry heat.
- Use a heat protectant
- Deep conditioning for hair health
Adjust your hair dryer’s temperature settings and use a T-shirt for drying.
- Apply leave-in conditioner to control frizz
- Blow dry with care using heat protectants.
Proper Drying Techniques
To properly dry your curly hair, it’s important to follow a few key techniques.
First, avoid blow drying immediately after towel drying as this can cause damage.
Instead, use a T-shirt to remove excess water before starting the drying process.
Allow your hair to air dry partially (around 60-80%) before using a blow dryer.
Apply a leave-in conditioner for added manageability during the drying process.
Lastly, be cautious with high heat settings on partially dried hair to prevent frizz or damage.
Avoiding Immediate Blow Drying After Towel Drying
First, wait until your hair is no longer dripping wet before starting the blow-drying process to avoid damage and frizz.
Removing Excess Water With a T-shirt
To properly dry your curly hair, start by removing excess water with a T-shirt. This method helps preserve curls and reduce frizz.
Allowing Hair to Air Dry Partially Before Using a Blow Dryer
Let your hair air dry partially before using a blow dryer to ensure optimal results.
- Enhances curl pattern
- Maximizes moisture retention
- Improves product absorption
- Minimizes frizz and flyaways
- Sets the foundation for smoother blow drying
Applying Leave-in Conditioner
Now, continue the process of properly drying your curly hair by applying a leave-in conditioner for added moisture and manageability.
Leave-in conditioners have numerous benefits such as providing hydration, reducing frizz, and defining curls.
When choosing a leave-in conditioner, look for curl-specific formulas that are moisturizing and nourishing.
Pairing it with other products like gels or mousses can enhance the results even further.
Some popular brands that offer excellent leave-in treatments include SheaMoisture and Carol’s Daughter Hair Milk Moisturize.
Using Caution With High Heat Settings
When blow drying curly hair, it’s crucial to use caution with high heat settings in order to prevent damage and maintain the health of your beautiful curls. High temperatures can lead to dryness, frizz, breakage, and loss of curl pattern if not handled properly.
-
Understand Heat Risks:
- Familiarize yourself with how excessive exposure
to high temperatures can negatively impact curly hair such as increased porosity,
weakened protein bonds resulting in brittle strands,and loss
of natural moisture leading drier overall texture
- Familiarize yourself with how excessive exposure
-
Temperature Control:
- Adjusting the dryer setting between medium-to-low will help reduce frizz potentiality
and minimize chances for breakage caused by overheating
- Adjusting the dryer setting between medium-to-low will help reduce frizz potentiality
-
Know Your Hair’s Heat Tolerance:
- Each person has a different level at which their locks become damaged due
sensitivity (due possibly from chemical treatments), previous styling routines etc so adjust accordingly
- Each person has a different level at which their locks become damaged due
-
Preventive Measures Against Heat Damage :
- Prioritize prevention over treatment; apply protectant products like serums,oilorsprays that provide additional barrier against thermal effects
Heat Protection
To protect your curly hair from heat damage during blow drying, it’s crucial to apply a thermal heat protectant.
Choose a protectant that suits your hair type, such as a cream-based option for thicker or type 4 textured hair.
Keep in mind the vulnerability of open cuticles when applying heat and ensure even distribution of the product for comprehensive coverage.
By taking these precautions, you can minimize potential damage and maintain healthy curls while blow drying.
Applying a Thermal Heat Protectant
To protect your curly hair from heat damage, apply a thermal heat protectant before blow drying.
Choose a product compatible with your hair type and follow proper application techniques for optimal results.
Choosing the Right Protectant for Your Hair Type
To protect your curly hair from heat damage while blow drying, choose a thermal heat protectant based on:
- Hair porosity
- Curl pattern
- Desired shine
Consider product layering for added humidity control and scalp health.
Considering the Vulnerability of Open Cuticles
To protect your curly hair from heat damage, consider the vulnerability of open cuticles.
Use moisturizing strategies, cuticle sealing techniques, and hairstylist-approved products like hair serums for protection.
Ensuring Even Distribution of the Protectant
To ensure optimal heat protection for your curly hair, distribute the thermal protectant evenly throughout your strands. This ensures coverage, product absorption, and maximum benefits for volume, shine, and style definition.
Finish with a hair serum.
Blow Drying Techniques
To achieve the best results when blow drying your curly hair, there are a few key techniques to keep in mind.
Firstly, consider sealing your ends with oil before starting the drying process to prevent splitting and damage.
Secondly, avoid adding additional oil during the drying process as it can lead to frizz or damage.
Lastly, sectioning your hair into smaller parts will make it easier and tangle-free for more efficient blow-drying.
Whether you choose to use a round brush or simply use your hands for a smoother finish is up to personal preference.
Sealing Ends With Oil Before Blow Drying
Before blow drying your curly hair, seal the ends with oil to prevent splitting and promote overall hair health.
Consider using Carol’s Daughter for effective sealing techniques.
Avoiding Adding Oil During the Drying Process
As you blow dry your curly hair, it’s important to avoid adding oil during the drying process.
Sectioning Hair for Easier and Tangle-free Blow Drying
Now, let’s dive into the blow drying techniques for curly hair. To make the process easier and prevent tangles, you’ll want to section your hair.
- Divide your hair into manageable sections using clips or scrunchies.
- Start at the back and work your way up to ensure even drying.
- Use a wide-toothed comb or detangling brush to gently remove any knots before blow drying each section.
Remember that properly sectioning your hair allows for better control over styling and promotes efficient drying while minimizing tangles and damage from heat.
Using a Round Brush or Hands for a Smoother Finish
To achieve a smoother finish when blow drying curly hair, you can use either:
- A round brush to gently straighten and shape the curls.
- Your hands to gently straighten and shape the curls.
Cautionary Measures
When blow drying your curly hair, it’s important to be aware of the limitations of blow dryers.
While they can help enhance and define your curls, they aren’t designed to completely straighten your hair.
Avoid excessive passes with the dryer to prevent heat damage and tension on your strands.
If you desire a completely straight look, it’s best to leave flat ironing in the hands of a professional hairstylist.
Trust that three passes with the blow dryer are sufficient for achieving desired length and texture without compromising hair health.
Recognizing the Limitations of Blow Dryers
When blow drying your curly hair, recognize the limitations of blow dryers in achieving bone-straight hair and manage heat concerns to prevent damage.
Avoiding Excessive Passes With the Dryer
To avoid excessive heat damage, make sure not to overdo it with the blow dryer. Follow these frizz prevention tips:
- Limit the number of passes with the dryer: Excessive use of a blow dryer can lead to dryness and breakage in curly hair due to prolonged exposure to high temperatures.
- Optimize product application for moisture retention: Apply a leave-in conditioner or moisturizing cream before using a blow dryer on your curls. This helps seal in moisture and protect them from becoming excessively dry during styling.
- Use caution to minimize heat exposure: Keep an eye on how long you’re exposing each section of your hair while using a blow dryer; this will prevent overheating that may result in damage or loss of curl pattern.
- Avoid over-drying by monitoring your hair as you style it. Stop blow-drying when your hair feels dry to the touch.
Reserving Flat Ironing for Professionals
To prevent potential damage, it’s best to leave flat ironing to professionals who’ve expertise in professional styling and thermal protectants.
Trusting That Three Passes With the Blow Dryer Are Sufficient
You only need to make three passes with the blow dryer for optimal results:
Understanding texture
Managing frizz
Styling techniques
Maintaining Awareness of Potential Damage When Overusing the Blow Dryer
Be mindful of the potential damage that can occur when you overuse the blow dryer, as it can lead to heat and tension damage.
| Potential Damage | Overuse Risks | Hair Health |
|---|---|---|
| Heat Damage | Breakage | Dryness |
| Tension Damage | Frizz | Split Ends |
Step-by-Step Guide for Blow-Drying Curly Hair
To blow-dry your curly hair, start with clean hair and gently blot excess water using a cotton T-shirt.
Apply a hair gel or mousse to define your curls and control frizz.
Then, use a diffuser attachment on your blow dryer to dry the roots in circular motions until they’re about 80% dry while allowing the rest of your hair to air-dry for natural texture.
Starting With Clean Hair
Continuing from our previous discussion on cautionary measures, let’s dive into the step-by-step guide for blow-drying curly hair by starting with clean and freshly washed locks.
Blotting Excess Water
To blot excess water from your curly hair before blow-drying, gently press a cotton T-shirt against your strands. This technique helps maintain moisture retention and prevent frizz while preserving the natural curl pattern.
Adding Hair Gel or Mousse
Now that you have finished blotting excess water from your hair, it’s time to move on to the next step: adding hair gel or mousse.
| Styling Techniques | Product Application |
|---|---|
| Enhances curl definition | Apply a generous amount of hair gel or mousse to wet hair, focusing on the mid-lengths and ends. |
| Controls humidity for frizz-free curls | Use your fingers or a wide-tooth comb to distribute the product evenly throughout your curls. |
| Adds volume and body | Scrunch your hair gently with upward motions while applying the gel or mousse for added volume and bounce. |
Diffusing Roots Until 80% Dry
Start by diffusing the roots of your curly hair until they’re 80% dry to benefit from:
- Enhanced curl definition
- Moisture retention
- Frizz control
Finishing Touches for Blow-Dried Curly Hair
To complete your blow-dried curly hair look, make sure to conclude with clean, dry hair.
Apply a small amount of hair serum to the lengths and ends for a smooth finish.
Choose a quality hair serum like the Elvive Extraordinary Oil Treatment and ensure even distribution for enhanced smoothness and shine.
Concluding With Clean, Dry Hair
Complete the blow-drying process by ensuring your hair is clean and dry, ready for the finishing touches.
Use concluding techniques for maintaining shine and styling flexibility.
Don’t forget last-minute tips and post-blowout care.
Applying a Small Amount of Hair Serum
To complete your blow-dried curly hair look, apply a small amount of hair serum for added smoothness and shine.
- Hair serum benefits:
- Provides smoothness and shine to the hair.
- Application techniques:
- Apply a small amount evenly through lengths and ends.
- Serum selection:
- Choose a high-quality serum suitable for your specific hair type.
Styling with serum enhances the overall appearance of blow-dried curly hair, providing additional smoothness and shine. By applying just a small amount of this product, you can achieve stunning results.
The benefits of using hair serums include reducing frizz, adding moisture to dry strands, taming flyaways, and enhancing curl definition. When selecting a serum for your curls or waves, make sure to choose one that’s specifically formulated for your texture type.
Apply it by distributing it evenly throughout the lengths and ends while avoiding excessive amounts near the roots to prevent greasiness or weighing down the curls/waves.
Hair serums are versatile products that offer numerous benefits when styling blow-dried curly hairstyles:
-
Hair Serum Benefits:
- Reduces Frizz: Serums contain ingredients that help seal in moisture on humid days or during heat styling sessions.
- Adds Moisture to Dry Strands: Curly textures tend to be drier due to their shape which makes it harder for natural oils produced at scalp level reach all parts; hence using serums bring additional hydration needed in these cases.
- Tames Flyaways & Controls Static Electricity
- Enhances Curl Definition
-
Application Techniques:
- Use Small Amounts
Squeeze out only enough product as required; avoid over-application since excess may leave residue buildup causing limp-looking locks!
- Start from Mid-Lengths/Ends
Begin application process at mid-lengths, working downwards towards ends; this way serum gets distributed evenly along entire hair shaft.
- Avoid Scalp Area
Keep serums away from roots/scalp area as it may result in greasy-looking strands. Focus application on mid-lengths and ends where hydration is most needed.
- Use Small Amounts
-
Serum Selection:
- Choose a high-quality serum that suits your specific hair type/needs:
- Fine Hair: Opt for lightweight formulas that won’t weigh down delicate strands.
- Thick or Coarse Hair: Use richer formulations to provide extra moisture and control frizz.
- Damaged or Color-Treated Hair: Look for serums with restorative properties to help repair damage caused by chemical processes or environmental factors like heat styling tools etc.
By incorporating the use of a suitable hair serum into your blow-drying routine, you can achieve smoother, shinier curls while also protecting them from external aggressors. Experimenting with different serums will allow you to find the perfect one for your unique texture needs.
Choosing a Quality Hair Serum
To enhance the smoothness and shine of your blow-dried curly hair, choose a quality hair serum for its styling efficacy and benefits.
Select wisely to ensure optimal results in serum application.
Ensuring Even Distribution of Serum
To ensure even distribution of serum for a smooth and shiny finish, apply a small amount throughout your hair using your hands.
Enjoying Beautifully Blow-dried and Styled Curly Hai
Now that you’ve completed the blow-drying process, it’s time to add those finishing touches and enjoy your beautifully blow-dried and styled curly hair.
- Experiment with different styling techniques to find what works best for your curls.
- Implement a curl maintenance routine to keep your hair looking its best between washes.
- Consider seasonal care adjustments to protect your curls from environmental factors and changing weather conditions.
Frequently Asked Questions (FAQs)
Can blow drying curly hair cause damage?
Blow drying curly hair can potentially cause damage if not done correctly.
It’s important to use heat protectant products, choose the right tools and techniques, and avoid excessive heat or tension to maintain healthy curls.
How long does it typically take to blow dry curly hair?
Blow drying curly hair can take anywhere from 20 to 45 minutes, depending on your hair’s thickness and length.
Can blow drying curly hair lead to frizz?
Blow drying curly hair can lead to frizz if not done properly.
To prevent this, use a diffuser attachment on a low heat setting, apply a leave-in conditioner for moisture, and avoid over-drying the hair.
Is it necessary to use a diffuser when blow drying curly hair?
Using a diffuser when blow drying curly hair is highly recommended. It helps to:
- Evenly distribute heat
- Reduce frizz
- Enhance curl definition
This tool allows for a gentle drying process that won’t disrupt the natural pattern of your curls.
What is the best heat setting to use when blow drying curly hair?
To achieve the best results when blow drying curly hair, it’s recommended to use a medium or low heat setting.
This helps reduce frizz and prevent damage to your curls, allowing for a healthier and more defined look.
Conclusion
In your quest for a fabulous blowout on your curly hair, utilizing the right tools, techniques, and products is key.
By incorporating a diffuser attachment and following our step-by-step guide, you can achieve salon-worthy results at home.
Remember to properly prepare your hair, protect it from heat damage, and use caution when blow drying.
Finish off with the right products and enjoy beautiful, bouncy curls that will make heads turn.

