This site is supported by our readers. We may earn a commission, at no cost to you, if you purchase through links.
 Applying bronzer can seem intimidating, but with a few simple tips, you’ll be a pro in no time.
First, choose a shade that’s one to two tones deeper than your natural skin tone – think sun-kissed, not orange.
Use an angled brush for powder bronzer or a damp sponge for cream bronzer.
Focus on the 3-shape technique: forehead, cheekbones, and jawline.
Blend, blend, blend! You want a seamless finish, not harsh lines.
And remember, less is more. Start light and build up for a natural glow.
Table Of Contents
- Key Takeaways
- Choosing the Right Bronzer Shade
- Essential Tools for Flawless Bronzer Application
- Mastering the 3-Shape Bronzer Technique
- Tailoring Bronzer Application to Face Shapes
- Perfecting Powder Bronzer Application Steps
- Cream Bronzer Tips for a Dewy Glow
- Common Bronzer Mistakes to Avoid
- Advanced Bronzer Techniques for a Flawless Finish
- Frequently Asked Questions (FAQs)
- How do you use a bronzer?
- Can you use bronzer on your face?
- Should you apply bronzer before brushing?
- How do I choose the best bronzer for my skin type?
- What is the 3 bronzer technique?
- How do you get the perfect bronzer?
- How to apply bronzer over 50?
- Where do you put bronzer for beginners?
- How to set bronzer for long-lasting results without fading ?
- Can I use bronzer as a contour substitute in makeup ?
- What is the difference between baked and powder bronzers ?
- How to choose the right bronzer formula for my skin type ?
- Should I apply moisturizer before or after using liquid bronzer ?
- Conclusion
Key Takeaways
- You’ve got to choose the right shade! Pick a bronzer that’s one to two tones deeper than your natural skin tone – think sun-kissed, not orange. Don’t be afraid to test it on your jawline in different lighting conditions to ensure it complements your skin tone and type.
- Don’t sabotage your sun-kissed glow by applying bronzer without blending! Use a fluffy brush or a damp sponge to merge the color with your skin for a seamless, natural-looking tan. Remember, blending is key, so take your time and be gentle.
- Now that you’ve mastered the basics, let’s talk about using bronzer to enhance your facial features. Accentuate your cheekbones by sweeping bronzer upwards and outwards, then contour your nose for a slimmer look. Define your jawline and forehead for a stronger profile, and sculpt your chin for a more defined shape – all with a light hand, of course!
- You’ve applied your bronzer like a pro, but don’t forget to set it in place for a long-lasting finish. Grab your favorite translucent powder and lightly dust it over your bronzed areas. This will help your sun-kissed glow stay put all day. For extra longevity, try using a Setting powder specifically designed for long-lasting wear.
Choosing the Right Bronzer Shade
When it comes to choosing the right bronzer shade, you want to find a color that complements your skin tone without looking too fake or orange (Source). By identifying your skin undertone, selecting a shade two tones deeper, testing bronzer before buying, and adjusting shade for different seasons, you can find your perfect match and achieve a flawless sun-kissed glow .
Identifying Your Skin Undertone
Ever wondered why your bronzer looks more like a muddy mess than a sun-kissed glow? It all starts with identifying your Skin undertone. Try the wrist test: look at the color of the veins on the inside of your wrist. If they’re green, you’ve got warm undertones; if they’re blue or purple, you’ve got cool undertones.
Selecting a Shade Two Tones Deeper
Now that you’ve got a handle on your skin undertone, it’s time to find your perfect bronzer match. Select a shade that’s one to two tones deeper than your natural skin tone to create a subtle, sun-kissed glow. For warm tones, look for golden or peach-based bronzers, while cool tones will love pink or berry-infused shades.
Testing Bronzer Before Buying
Before you buy bronzer, don’t be shy – swatch it on your jawline in different lighting conditions. This is really important to make sure the color matches your skin tone and type. Here are a few things to keep in mind:
- Check the color in natural and artificial light to see how it changes.
- Consider the product texture: cream, powder, or gel.
- Test on a small area to avoid any potential skin irritation.
Adjusting Shade for Different Seasons
As you’re testing bronzers, remember your skin tone changes with the seasons. In summer, you’re naturally darker, while winter leaves you paler. Adjust your bronzer shade accordingly! For a seamless shift in color, go one shade lighter in winter and one shade deeper in summer. This makes sure your bronzer complements your seasonal skin, not clashes with it.
Essential Tools for Flawless Bronzer Application
To achieve that sun-kissed glow, you’ll need the right tools in your makeup arsenal. For a flawless bronzer application, grab an angled brush for powder bronzer, a sponge or your fingers for cream bronzer, a small fluffy brush for precise application, and a blending brush for a seamless finish .
Angled Brushes for Powder Bronzer
The secret to a flawless sun-kissed glow lies in the right tools. For powder bronzer, an angled brush is your BFF. Here’s what to look for:
- A medium-sized brush for precise application
- A soft, angled shape to define cheekbones
- A dense brush with synthetic fibers for even coverage
- A gentle touch to blend, blend, blend for a natural finish.
Sponges and Fingers for Cream Bronzer
Now that you’ve mastered the art of angled brushes for powder bronzer, it’s time to get up close and personal with cream bronzer. For a natural glow, try using a damp sponge or your fingers to apply cream bronzer. This will help you achieve a seamless blend and a radiant complexion.
| Tool | Best for |
|---|---|
| Damp Sponge | Sheer, even coverage |
| Fingers | Targeted, buildable application |
| Blend, blend, blend! |
Small Fluffy Brushes for Precise Application
Now that you’ve mastered the art of using sponges and fingers for cream bronzer, it’s time to get precise with a small fluffy brush! This little hero is perfect for targeting specific areas, like the tops of your cheekbones or the bridge of your nose. Here’s what you need to know:
- Look for a brush with soft, flexible bristles that won’t scratch your skin.
- Use a light touch to build up color gradually.
- Clean your brush regularly to prevent clogged pores and uneven application.
Blending Brushes for Seamless Finish
The secret to a seamless finish? A trusty blending brush! Choose a fluffy, synthetic brush that’s about 1-2 inches in diameter. Gently sweep it across your face, feathering the bronzer outwards and upwards. This helps to diffuse harsh lines and creates a natural, sun-kissed glow. Remember, blending is key, so take your time and be gentle!
Mastering the 3-Shape Bronzer Technique
You’re just a few swoops of a brush away from a sun-kissed glow – now it’s time to master the 3-shape bronzer technique, a simple yet game-changing method for applying bronzer like a pro. By tracing the shape of a "3" across your forehead, cheekbones, and jawline, you’ll create a seamless, natural-looking contour that enhances your features without looking too done-up.
Applying Bronzer to Forehead and Temples
Time to get your glow on! Applying bronzer to your forehead and temples is key to a sun-kissed look. Here’s how:
- Sweep bronzer along your hairline, just above your eyebrows, for a natural-looking contour.
- Dot bronzer on your temples, blending upwards and outwards for a seamless finish.
- Blend, blend, blend – you want a soft, warm glow, not harsh lines.
Contouring Cheekbones With Bronzer
Now that you’ve mastered applying bronzer to your forehead and temples, let’s sculpt those cheekbones. Use a light hand when contouring with bronzer, as it’s easier to build up than it’s to blend out. Remember, the goal is to enhance your natural shape, not to look like you’re wearing a lot of makeup.
| Cheekbone Shape | Bronzer Placement | Brush Technique |
|---|---|---|
| High | Just above the apples | Light, sweeping motions |
| Low | Along the hollows | Gentle, upward strokes |
| Round | Across the entire cheek | Soft, circular motions |
Defining Jawline and Neck Area
Now it’s time to define that jawline and neck area! Use a light hand when applying bronzer to these areas, as you want to create subtle definition, not harsh lines. Gently sweep the bronzer along the edges of your jawline and down the sides of your neck, blending as you go for a seamless finish.
Blending for a Natural Sun-Kissed Look
Time to blend for a natural sun-kissed look! Grab your trusty blending tools and get ready to master the 3-shape bronzer technique. Here’s how:
- Blend in small circles: Use gentle, sweeping motions to soften harsh lines.
- Feather out edges: Make sure you have a smooth finish by blending bronzer into surrounding skin.
- Check your work: Review your application in natural light to avoid blending mistakes.
Tailoring Bronzer Application to Face Shapes
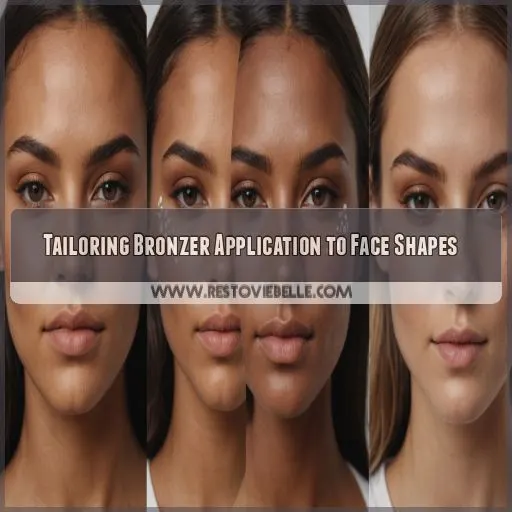
When it comes to bronzer, a one-size-fits-all approach just won’t cut it – your face shape plays a big role in how you should apply it. By tailoring your bronzer application to your unique face shape, you’ll be able to enhance your natural features and achieve a sun-kissed glow that looks and feels like you.
Bronzing Techniques for Heart-Shaped Faces
For heart-shaped faces, focus on enhancing your natural glow. Apply bronzer to the forehead, temples, and jawline to create definition. Softly contour the chin to balance your features.
| Bronzer Placement | Effect | Tips |
|---|---|---|
| Forehead | Adds warmth | Light hand for natural look |
| Temples | Defines face shape | Blend well to avoid harsh lines |
| Jawline | Creates definition | Soft, gentle strokes |
| Chin | Balances features | Subtle contouring |
Applying Bronzer on Square Face Shapes
If you have a square face shape, you’re all about angles. When applying bronzer, focus on softening those sharp lines.
- Use a light hand when applying bronzer to the forehead and jawline, as these areas are already defined.
- Blend, blend, blend to create a seamless finish.
- Apply bronzer to the apples of your cheeks to create the illusion of more curved cheekbones.
Enhancing Oval and Round Face Shapes
You’re in luck if you’ve got an oval or round face shape! Bronzer can add definition and slim down your features. Here’s how to do it:
| Face Shape | Bronzer Application | Tips |
|---|---|---|
| Oval | Apply bronzer to cheekbones, forehead, and jawline | Blend, blend, blend! |
| Round | Focus on defining cheekbones and jawline | Use light, upward strokes |
| Oval | Add a touch of bronzer to the nose for a natural glow | Soft and subtle is key |
| Round | Blend bronzer into the hairline for a seamless finish | Less is more, lovely! |
Balancing Rectangle-Shaped Faces With Bronzer
You’ve mastered oval and round face shapes, now let’s tackle those gorgeous rectangle-shaped faces! To balance a longer face, focus on the horizontal lines. Apply bronzer to the temples and forehead, then subtly contour the cheekbones. Blend, blend, blend! This creates a softer, more angular look. Finish by defining the jawline for a flawless, sun-kissed glow.
Perfecting Powder Bronzer Application Steps
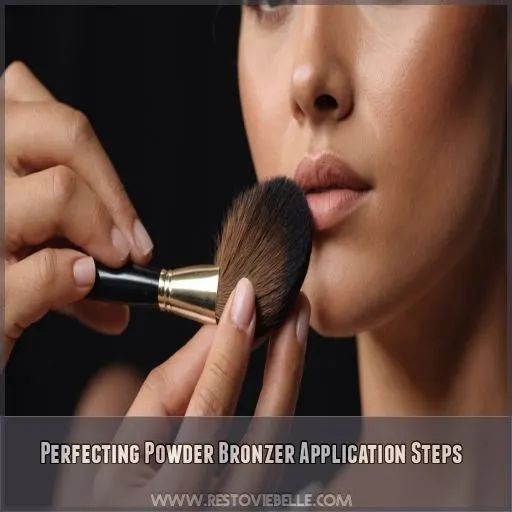
You’re just a few steps away from achieving that effortless, sun-kissed glow with powder bronzer. To get started, let’s break down the essential steps to perfect your powder bronzer application, from prepping your skin to building color for a natural-looking finish.
Prepping Skin With Moisturizer and Primer
Before applying powder bronzer, prep your skin with a hydrating moisturizer and primer. Choose a lightweight, oil-free moisturizer that won’t clog pores, and a primer that creates a smooth canvas. This dynamic duo will help your bronzer stay in place all day, giving you a radiant, sun-kissed glow that’s simply effortless.
Tapping Off Excess Product From Brush
Now that your skin is prepped with moisturizer and primer, it’s time to get your brush ready.
Tap off excess product to avoid waste and make sure you have a smooth application.
Gently knock the brush against the counter or your hand to remove any loose powder.
A clean brush is key to a flawless bronzer application, so don’t skip this step!
Using Circular Motions for Even Application
Now it’s time to buff that bronzer into your skin.
Using circular motions with your brush helps distribute the product evenly, avoiding streaks and harsh lines.
Think of it as blending a masterpiece – gentle, sweeping strokes that marry the bronzer to your skin.
This technique helps create a natural, sun-kissed look that’s more "I spent the day at the beach" than "I’m wearing a ton of makeup".
Building Color Gradually for Natural Results
Your bronzer game is about to get a major upgrade! To build color gradually for natural results, start with a light hand and layer, layer, layer. Think of it as adding subtle warmth to your skin, not an instant tan. Gradually build up the color, and don’t be afraid to blend, blend, blend to avoid that dreaded orange glow.
Cream Bronzer Tips for a Dewy Glow
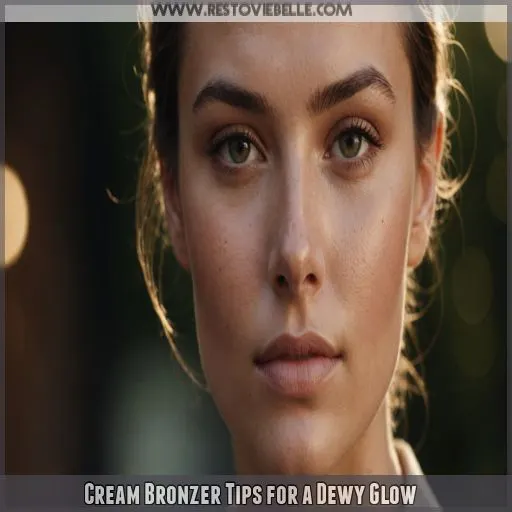
You’re about to discover the secret to a radiant, dewy glow with cream bronzer – and trust us, your skin will thank you! With a few simple tips and tricks, you’ll be mastering the art of cream bronzer application in no time, and your complexion will be looking sun-kissed and stunning all year round.
Warming Product on Back of Hand
The secret to a seamless cream bronzer application? Warming it up, baby! Before applying, gently rub the product between your ring finger and thumb or on the back of your hand to bring it to body temperature. This helps to:
- Soften the formula for easier blending
- Bring out the pigment for a more natural finish
- Reduce the appearance of pores
- Create a more even, sun-kissed glow
Applying With Fingers or Damp Sponge
Now that your cream bronzer is warmed up, it’s time to apply it. Use your fingers or a damp sponge to give your skin a natural-looking glow. Gently pat the bronzer onto your skin with your ring finger, or use a sponge to blend it into those hard-to-reach areas. This will help create a smooth, sun-kissed finish.
Blending Edges for Seamless Finish
The art of blending – where magic happens! With a cream bronzer, grab a damp sponge or a small fluffy brush to seamlessly merge the edges. Gently sweep the sponge or brush in circular motions, feathering the bronzer outwards and upwards. This subtle trick creates a soft, sun-kissed glow that’s anything but harsh or obvious.
Setting Cream Bronzer With Powder for Longevity
Now that you’ve blended those edges to perfection, it’s time to set that cream bronzer for a long-lasting finish. Think of this step as the "insurance policy" for your sun-kissed glow. Here are three ways to do it:
- Light dusting: Use a translucent powder to set the bronzer without adding extra color.
- Matching powder: Choose a powder that matches your bronzer shade for added depth.
- Setting spray: Finish with a setting spray to keep everything in place.
Common Bronzer Mistakes to Avoid
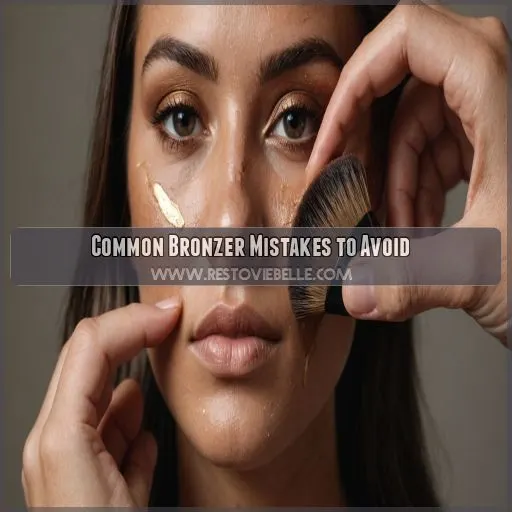
With bronzer, it’s easy to get a little carried away – but trust us, you want to avoid those dreaded muddy cheeks and harsh lines!
You can avoid these common mistakes by steering clear of:
- Using too much product.
- Applying without blending.
- Choosing the wrong shade.
- Not checking your handiwork in natural light.
Using Too Much Bronzer
We’ve all been there – you get a bit too enthusiastic, and suddenly your sun-kissed glow turns into a muddy mess.
To avoid this, start with a light hand and build up your color gradually.
You’ve mastered the art of cream bronzer, but now it’s time to tackle a common mistake: using too much bronzer.
Applying Bronzer Without Blending
Don’t sabotage your sun-kissed glow by slapping on bronzer without blending! You’ve avoided using too much bronzer, now it’s time to perfect the finish. Failing to blend can leave harsh lines, uneven application, and a muddy look. Softly sweep your brush or sponge in circular motions to merge the color with your skin for a seamless, natural-looking tan.
Choosing the Wrong Shade
The bronzer blunder that can make you look like a walking traffic cone – choosing the wrong shade! You’ve probably been there, done that, and got the orange-hued t-shirt. To avoid this faux pas, remember:
- Know your undertone: Cool, warm, or neutral?
- Test before you buy: Swatch it on your jawline.
- Don’t be afraid to mix: Blend shades for a custom match.
- Get a second opinion: Ask a friend or a pro for help!
Not Checking Application in Natural Light
You’ve dodged the wrong shade bullet, but there’s another common mistake: not checking your bronzer in natural light.
Indoor lighting can be deceiving, making your sun-kissed glow look more like a muddy mess.
Take a quick peek outside or by a window to make sure your bronzer is blended and natural-looking.
Trust us, it makes all the difference!
Advanced Bronzer Techniques for a Flawless Finish
You’ve mastered the basics of bronzer application, now it’s time to take your skills to the next level with advanced techniques that’ll give you a flawless, sun-kissed glow. From layering bronzer for a natural look to using it to enhance your facial features, these expert tips will help you achieve a radiant complexion that’s all yours.
Layering Bronzer for a Natural Look
The art of layering bronzer! To achieve a natural sun-kissed glow, start with a light hand and build up gradually. Apply a small amount to your cheekbones, temples, and forehead, then blend, blend, blend. Avoid harsh lines by using a fluffy brush or damp sponge. Remember, it’s all about subtle, natural-looking layers – not a muddy mess!
Applying Bronzer to Nose and Chin
Now that you’ve mastered layering bronzer, let’s talk about applying it to your nose and chin. You want to enhance these features without looking like you’re trying too hard. Here are some tips:
- Use a light hand when applying bronzer to your nose, focusing on the sides and bridge for a natural-looking glow.
- Define your chin by applying bronzer just below the jawline.
- Blend, blend, blend – harsh lines are a definite no-go!
Using Bronzer to Enhance Facial Features
Now that you’ve mastered the basics, let’s talk about using bronzer to enhance your facial features. Accentuate your cheekbones by sweeping bronzer upwards and outwards, then contour your nose for a slimmer look. Define your jawline and forehead for a stronger profile, and sculpt your chin for a more defined shape – all with a light hand, of course!
Setting Bronzer With Powder for a Long-Lasting Finish
Now that you’ve enhanced your facial features with bronzer, let’s set it in place for a long-lasting finish. Grab your favorite translucent powder and lightly dust it over your bronzed areas. This will help your sun-kissed glow stay put all day. For extra longevity, try using a setting powder specifically designed for long-lasting wear.
Frequently Asked Questions (FAQs)
How do you use a bronzer?
You’re about to glow up! To use a bronzer, apply it in light, upward strokes with a brush or dab it on with a sponge or fingers, building gradually for a natural look that enhances your features.
Can you use bronzer on your face?
You can use bronzer on your face to add warmth and dimension, but choose a shade that’s one to two shades darker than your skin tone to avoid looking unnatural (Source).
Should you apply bronzer before brushing?
When applying bronzer, it’s generally best to brush your face first with a fluffy, angled brush or a bigger, fluffier brush to work the product into the bristles before applying for a smooth finish.
How do I choose the best bronzer for my skin type?
You’re on the hunt for the perfect bronzer! Choose a shade one to two shades deeper than your skin tone, considering your undertones: golden for yellow, orange for olive, and neutral for fair skin.
What is the 3 bronzer technique?
You’re about to master the 3 bronzer technique! Sweep bronzer in the shape of the number three, from temple to cheekbone to jawline, blending like crazy to avoid harsh lines and achieve that effortless, sun-kissed glow.
How do you get the perfect bronzer?
To get the perfect bronzer, start by choosing a shade one to two shades deeper than your skin tone . Then, apply it in light, upward strokes with a brush or dab it on with a sponge or fingers .
How to apply bronzer over 50?
Practice makes perfect" – especially when applying bronzer over Start by selecting a shade that complements your skin tone, then use light, upward strokes to define cheekbones, and blend well to avoid harsh lines.
Where do you put bronzer for beginners?
You’re new to bronzer? Start by applying it to the high points of your face, like your cheekbones, temples, and nose, where the sun would naturally hit (Source). Blend, blend, blend for a natural-looking glow !
How to set bronzer for long-lasting results without fading ?
The secret to long-lasting bronzer? Setting it with a light dusting of translucent powder, of course! You do this, and you’ll be saying goodbye to fading and hello to a sun-kissed glow that lasts all day.
Can I use bronzer as a contour substitute in makeup ?
You can use bronzer as a contour substitute, but keep in mind it’s meant to add warmth, not define features like contouring . For a more precise look, use a dedicated contour product .
What is the difference between baked and powder bronzers ?
Coincidentally, choosing between baked and powder bronzers can be as simple as considering your skin type – baked bronzers suit oily skin, while powder bronzers work better for dry or combination skin, offering a more customizable finish.
How to choose the right bronzer formula for my skin type ?
Choosing the right bronzer formula is key! If you have dry or mature skin, opt for liquid or cream bronzers . For oily skin, powder bronzers are your best bet . Normal skin? You can rock any formula!
Should I apply moisturizer before or after using liquid bronzer ?
Don’t worry, applying moisturizer won’t ruin your liquid bronzer look! Actually, applying moisturizer before using liquid bronzer helps create a smooth canvas for an even, natural-looking glow – so go ahead and moisturize before bronzing!
Conclusion
Don’t let the fear of looking like a pumpkin hold you back – mastering the art of bronzer is easier than you think.
With these 8 pro tips, you’ll be on your way to a flawless, sun-kissed glow.