This site is supported by our readers. We may earn a commission, at no cost to you, if you purchase through links.
 The best bleach for your hair depends on several factors, including your hair type, condition, and desired results. Here’s a quick lowdown on some top hair bleach kits:
- L’Oreal Super Oreal Bleach Powder: Lifts hair up to seven levels and has a creamy consistency.
- Sparks Powder Hair Lightener: An extra-strength formula that effectively lightens darker shades.
- Manic Panic Flash Lightning Bleach Kit: This vegan and cruelty-free option lightens hair up to five levels.
- Punky Colour Bleach Kit: An all-in-one kit, including hair repair and protection products.
For more in-depth insights, read on to discover how to choose the right bleach, prepare your hair, and maintain those gorgeous bleached locks.
Table Of Contents
- Key Takeaways
- Top 4 Best Hair Bleach Kits
- Things to Consider Before Bleaching
- How to Choose the Best Hair Bleach
- Hair Bleaching at Home: What to Expect
- Professional Insights on Bleaching
- Understanding Hair Bleaching Process
- Tips and Warnings for Bleaching Hair
- Hair Bleach Maintenance and Aftercare
- Frequently Asked Questions (FAQs)
- What’s the best bleach to use for hair?
- Which hair bleach is least damaging?
- What bleach do hair professionals use?
- What is the best bleach for color correction?
- How long should I wait to bleach my hair again?
- Can I bleach my hair twice in one day?
- What happens if you bleach hair that has already been bleached?
- How long does it take to bleach hair?
- What volume developer to bleach hair?
- Conclusion
Key Takeaways
- Lifting your hair color is no small feat, and choosing the right bleach is key. From L’Oreal to Manic Panic, different kits offer varied lifting levels, so decide if you want to go a few shades lighter or make a drastic change.
- Be cautious when bleaching. It’s a powerful process that can dry out and damage your hair. Make sure your hair is in good condition before you start, and always do a patch test.
- The volume of the developer you choose matters. Go for a lower volume if you want a more subtle lift, and opt for higher volumes if you’re looking for a more dramatic change.
- Bleaching is just the beginning. Maintaining your new hair color involves regular toning, deep conditioning, and saying no to heat styling. It’s a commitment!
Top 4 Best Hair Bleach Kits
Picking the right hair bleach kit is super important if you’re going DIY. We’ve rounded up the top four hair bleach kits, so you can lighten your locks like a pro.
1. L’Oreal Super Oreal Bleach Powder
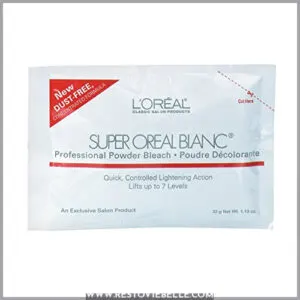
If you’re looking for a quick and controlled lightening action, the L’Oreal Super Oreal Bleach Powder might be your new BFF. This professional powder bleach lifts your hair up to seven levels, giving you maximum control over your desired results. And the best part? It stays nice and creamy throughout the whole process, so you won’t end up with a drippy mess.
But before you grab your gloves, keep in mind that some users have reported less-than-stellar results on hair with a colourful background. So, if you’ve been rocking rainbow locks, you might want to opt for a different kit.
Best For: This bleach is best for those wanting quick and controlled lightening on natural hair colors.
- Lifts up to 7 levels
- Creamy consistency
- Dust-free formula
- May not lift as much on colored hair
- Some users reported brassiness
- Can be a bit pricey
2. Sparks Powder Hair Lightener
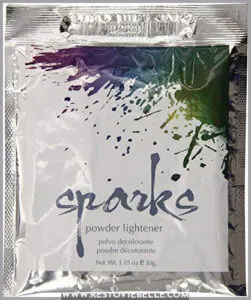
If you’re after maximum lifting power, Sparks Powder Hair Lightener is a great choice. This extra-strength formula comes in a cream format and is suitable for all hair types. It’s also dedusted, meaning it’s finely milled for easy mixing and application. While it effectively lightens dark shades, some users have reported irritation and damage, so careful application is key. You’ll need to buy a developer separately, and Sparks recommends using their liquid developer for predictable results. One packet is typically enough for short to shoulder-length hair, but longer hair may need more.
Best For: Those looking for a strong bleach to lift dark hair to a bright yellow tone.
- Extra strength formula for maximum lifting power.
- Dedusted for easy mixing and application.
- Effectively lightens dark shades.
- Can be too strong for some users, leading to irritation and damage.
- Requires careful application to avoid uneven lightening.
- Developer needs to be purchased separately.
3. Manic Panic Flash Lightning Bleach Kit
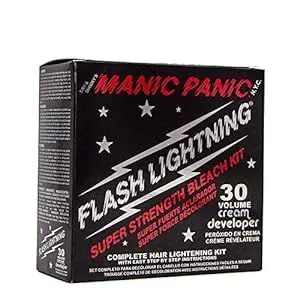
This vegan and cruelty-free bleach kit from Manic Panic is designed to lighten hair up to five levels, making it perfect for those with light to dark brown or black hair who want to achieve a medium or light blonde shade. The dust-free bleach powder effectively prepares your hair for vivid colors, making sure the lifting process is even for consistent results. The kit comes with all the essentials, including gloves, a mixing tub, and a tint brush, making it a great value choice. However, it’s always important to perform a strand test first to see if you get the results you want and to avoid any potential skin irritation or hair damage.
Best For: Those with light to dark brown or black hair looking to achieve a medium or light blonde shade.
- Dust-free bleach powder for even lifting and consistent results.
- Includes all the essentials for a convenient and affordable experience.
- Vegan and cruelty-free formula.
- May cause skin irritation.
- Can potentially damage hair.
- May not lighten hair as much as advertised.
4. Punky Colour Bleach Kit
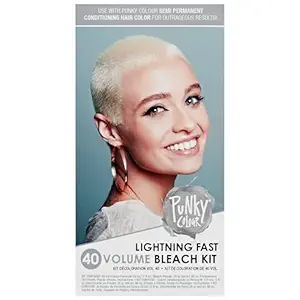
The Punky Colour Bleach Kit is an all-in-one bleaching powerhouse that delivers salon-quality results at home. It comes with everything you need, including gloves, a tint brush, 40 Vol Cream Peroxide, bleach powder, an Intrabond Serum Additive, and a hair repairing complex hair mask.
This vegan-friendly and cruelty-free formula is designed to give you the lightest and brightest results, thanks to its powerful 40-volume developer. But it’s not just about lightening; the Intrabond Hair Repairing Complex also works to repair damaged hair bonds while protecting your hair during the bleaching process.
Keep in mind that the processing time depends on your natural hair color and its condition and porosity. The darker or coarser your hair, the longer it will take to achieve your desired lightness. Always follow the instructions carefully and never use heat—this product is designed to work at room temperature.
Best For: Those looking to lighten their hair at home with a powerful bleach kit that also helps repair and protect hair.
- Fast and effective lightening action.
- Works well on dark hair.
- Includes hair repair and protection products.
- May not be enough for thick or long hair.
- Can be strong and may cause scalp irritation.
- May leave hair with a slight yellow tint.
Things to Consider Before Bleaching
Before you bleach, there are a few key things to think about. First, check out your hair’s health – is it damaged, colored, or chemically treated? Next, ask yourself if you’re confident in your bleaching skills and have the right stuff.
Hair Damage
Before you bleach, it’s really important to check how healthy your hair is and how much damage it has.
If your hair is already damaged, porous, or brittle, bleaching can make these problems worse.
Be honest with yourself about the condition of your hair.
If it’s been through a lot with heat styling, chemical treatments, or frequent dye jobs, it might need a break.
Bleaching Ability
Bleaching your hair can be tricky, and it’s important to know your limits. Ask yourself:
- Are you confident in your bleaching abilities?
- Do you have the skills to bleach your hair safely and effectively?
- Are you prepared to deal with any potential mishaps or damage?
If you’re unsure, it’s best to leave it to the professionals. Bleaching hair is a chemical process that can cause damage if not done correctly, so it’s not worth the risk unless you’re absolutely certain you know what you’re doing.
Developer Volume
When choosing a hair developer, you need to think about its volume or strength. The volume of a developer tells you how much hydrogen peroxide it has, which decides how fast and aggressive the bleaching process will be.
| Developer Volume | Hydrogen Peroxide Content | Suitable For |
|---|---|---|
| 10 Volume | Low | Toning hair |
| 20 Volume | Medium | Lifting hair 1-2 levels |
| 30 Volume | High | Lifting hair 3-4 levels |
| 40 Volume | Very High | Lifting hair 5-6 levels |
It’s important to pick the right developer volume based on your hair color and how much lighter you want to go. For example, if you have dark hair and want to go a lot lighter, you’ll need a higher volume developer. But be careful, because higher volumes can also damage your hair more.
Maintenance
Bleached hair is high maintenance. You’ll need to be prepared for a new hair care routine, including:
- Regular toning to neutralize brassiness
- Deep conditioning treatments to maintain moisture
- Avoiding heat styling to prevent further damage
Supplies
Supplies are key to a smooth bleaching sesh. Make sure you’ve got your gloves, a mixing bowl, and a brush for slathering on that bleach. Oh, and don’t forget the developer – it’s like the sidekick to your bleach’s superhero. They work together to lighten your locks.
How to Choose the Best Hair Bleach
When choosing the best hair bleach, it’s important to think about your hair type, condition, and the results you want. Picking the right bleach helps keep your hair healthy and gives you the look you want.
Hair Type
When choosing the best hair bleach, it’s important to keep your hair type in mind. Here’s a quick guide to help you figure out your options:
- Color Depth: Your hair’s color depth, ranging from 1 (darkest) to 10 (lightest), determines how many bleaching sessions you’ll need. Darker hair, packed with more melanin, requires more sessions to achieve your desired shade.
- Texture Type: Whether your hair is straight, wavy, curly, or coily, affects how bleach is applied and the overall outcome. Curly and coily hair, for instance, tend to be more fragile and may require a gentler approach.
- Strand Test: Always perform a strand test. It’s a sneak peek into how your hair will react to the bleach, helping you dodge any disasters.
Hair Condition
When picking a hair bleach, you need to think about what state your hair is in. Is it damaged, colored, or healthy? Let’s break down these things:
- Damaged Hair: If your hair is already damaged, be careful. Bleaching can make it even weaker, leading to more breakage.
- Color-Treated Hair: Hair that’s been colored is more porous and fragile. Choose a gentler bleach, and always do a strand test to see if your hair can handle it.
- Fine or Coarse Texture: How your hair feels matters too. Fine hair might need a more delicate approach, while coarse hair can usually handle stronger formulas.
- Brassy Tones: If you’re dealing with brassy tones, pick a bleach that targets orange or yellow undertones. This will help you get a more neutral blonde.
Desired Results
Think about your color dreams. Are you going for white-blonde, caramel highlights, face-framing streaks, or an all-over blonde look with a shadow root? Knowing your hair goals will help you select the best hair bleach and developer volume for your DIY dye job.
Application Technique
Now, let’s get into the nitty-gritty of choosing the right hair bleach for your application technique. Do you want to go for an on-scalp or off-scalp bleach job? This decision will narrow down your bleach options.
On-scalp bleaching is great for root touch-ups or all-over colour, but it’s important to be extra cautious to avoid irritation. Off-scalp techniques like balayage, foiling, or ombre can give you a more subtle, natural look.
Hair Bleaching at Home: What to Expect
So, you’re thinking of bleaching your hair at home? Before you jump into DIY hair bleaching, it’s important to know what to expect. From prepping your hair to mixing and applying the bleach, there’s a lot more to it than you might think.
Preparing Hair
Getting your hair ready for bleaching is super important to get the best results and minimize any damage. Here are some tips to prep your hair for the bleaching process:
- Avoid heat styling and chemical treatments: In the week leading up to your bleaching session, avoid using any heat styling tools like flat irons or curling wands. Also, stay away from chemical treatments like perms or relaxers. This gives your hair a break and makes sure it’s in the best possible shape before bleaching.
- Moisturize and nourish: In the days before bleaching, focus on hydrating and nourishing your hair. Use a good conditioner or hair mask to really moisturize your strands. This helps strengthen your hair and gets it ready for the bleaching process.
- Avoid washing your hair before bleaching: It’s best to bleach your hair when it’s a bit oily. The natural oils in your hair can help protect your scalp and reduce irritation during the bleaching process. So, skip the shampoo and only condition if you need to rinse your hair before bleaching.
- Section your hair: Before you start the bleaching process, section your hair into manageable parts. This will make it easier to apply the bleach evenly and completely. Use clips or ties to separate the sections and make sure you have a well-lit workspace and all the necessary tools within reach.
Mixing and Applying Bleach
Mixing and applying bleach is a key step in the hair bleaching process. While it might seem simple, there are a few things to keep in mind to get the best results.
First, always follow the instructions on the bleach package for mixing the powder and developer. The consistency of the mixture is important – you want it to be thick enough to stay put when applied, but not so thick that it’s difficult to spread.
Once you’ve achieved the right consistency, it’s time to apply. Start by sectioning your hair into manageable segments to make sure you get a thorough application. Then, using a brush or applicator bottle, apply the bleach to the midsections and ends of your hair first, and then move on to the roots.
Processing Time
Bleach processing time depends on your hair’s current color and the desired lift. Leaving bleach on for too long can lead to damage, so follow instructions and watch your hair closely. Covering hair with a plastic cap creates a humid environment to speed up processing.
Washing and Toning
After bleaching, it’s really important to thoroughly wash your hair to remove all traces of the product. But be gentle; you don’t want to strip your hair of its natural oils. Once your hair is clean, it’s time to tone. Toning is like the magic wand of hair coloring. It helps:
- Neutralize brassiness
- Achieve your desired color
- Add shine and gloss
- Remove unwanted yellow tones
You can use a toner, hair gloss, or even a color-depositing shampoo to tone your hair.
Professional Insights on Bleaching
Now, let’s hear from the pros. We’ve gathered insights from top hair experts to give you the lowdown on bleaching. From their go-to products to their words of caution, you’ll get an insider’s perspective on achieving the perfect bleach job.
Matt Rez on Redken Flash Lift Bonder Inside
Matt Rez, a renowned hair colorist, recommends Redken Flash Lift Bonder Inside for its impressive lifting power and built-in bond builder.
This product can lift hair up to eight levels, making it perfect for achieving an all-over blonde look.
The bond builder helps protect the hair during the bleaching process, reducing the risk of damage.
Rez’s expertise and endorsement of this product give it a stamp of approval for those seeking professional-level results at home.
Reece Walker on Wella Blondor
Reece Walker, a hair expert, shares his preference for Wella Blondor for bleaching hair.
He highlights its gentleness and ability to lift hair color without the need for high-volume peroxide.
This professional-grade bleach is known for its conditioning agents and dust-free formula, making it a top choice for achieving salon-quality results at home.
Wella Blondor is a gentle yet powerful option for those looking to lighten their locks effectively while minimizing potential damage.
John Pulitano on Bleaching at Home
John Pulitano, a hair expert, advises against bleaching your hair at home. He understands the risks of damage and encourages you to seek professional help instead. Here are four reasons why:
- Risk of Uneven Color: Bleaching at home can lead to patchy or uneven results, leaving you with an undesirable look.
- Hair Damage: The bleaching process can be harsh, and without proper knowledge, you may end up with dry, brittle, or broken hair.
- Irritation: Bleach can cause scalp irritation or damage if not applied correctly, leading to discomfort and potential hair loss.
- Health Hazards: Bleach is a strong chemical, and improper handling or application can pose health risks.
Kristen Fleming on Conditioning Ingredients
Kristen Fleming, a hair expert, emphasizes the importance of conditioning ingredients in bleach formulas. She recommends prioritizing products with built-in conditioners and bond builders to minimize damage and keep your hair healthy. This is especially important if you’re going for a dramatic change or have fragile hair.
Understanding Hair Bleaching Process
Before you jump into bleaching your hair, it’s important to get the lowdown on the whole process. Bleaching is a big deal, and knowing what you’re in for will help you get the results you want while keeping damage to a minimum.
Bleach Vs. Lightening
If you’re thinking about changing your hair color,
bleaching and lightening are two different things.
Bleaching is like starting fresh with your hair color, getting rid of all the pigment so you have a clean slate.
Lightening, on the other hand, just takes some of the color out, making your hair a few shades lighter but not completely removing the color.
Potential Damage
Bleaching is a powerful process that can cause some serious harm to your hair if you’re not careful. It’s like setting off a tiny bomb on your head –the wrong move and you might end up with dry, brittle hair that snaps off like twigs. Yikes!
Professional Recommendations
Most hair color professionals advise against bleaching your hair at home. Why? Because they’ve seen the damage that can be done. It’s a tricky process, and if you don’t know what you’re doing, you could end up with dry, brittle hair or worse, breakage. So, unless you’re a hair color designer yourself, it’s best to leave it to the experts.
Safe Practices
Bleaching your hair can be a fun way to switch up your look, but it’s important to take precautions to make sure you don’t damage your hair or scalp.
Always follow package directions closely and perform a strand test first.
When applying bleach, start about an inch away from your scalp and work your way down.
After processing, be sure to shampoo thoroughly.
Avoid heat styling and chemical treatments for a week before bleaching, and give your hair some extra love with a deep conditioning treatment.
Tips and Warnings for Bleaching Hair
So, you’ve decided to take the plunge and bleach your hair at home. Before you get started, there are a few important tips and warnings you should know about to make sure the process goes smoothly and safely.
Getting the Perfect Results
Getting the look you want is all about being careful and thorough. Take your time to make sure every strand is coated evenly, avoiding any patchiness or uneven tones. It’s important to follow the instructions and processing times provided with your bleach kit for the best outcome.
Avoiding Irritation
To avoid irritation, consider these tips:
- Avoid washing your hair 3–4 days before bleaching to allow natural oils to create a protective layer.
- Patch test to check for allergic reactions.
- Opt for a salon treatment with a reputable stylist experienced in bleaching different hair types.
Minimizing Damage
| Tip | Description |
|---|---|
| Avoid Mechanical Manipulation | Refrain from brushing, lathering, pulling, twisting, or rubbing your hair while the bleach is processing. |
| Use Lower Developer Volume | Opt for a 20-volume developer or less when applying bleach close to the scalp to prevent irritation and potential breakage. |
| Prioritize Hair Health | Make sure your hair is healthy before bleaching. Avoid heat styling and chemical treatments for a week prior, and deeply moisturize your strands. |
| Follow Package Directions | Carefully read and adhere to the instructions provided with your chosen bleach product. Always perform a strand test first to assess your hair’s reaction. |
Black Hair Dye and Metals
When bleaching dark hair, avoid box dyes that may contain metal compounds. These compounds can react with bleach, leading to damaged hair.
If you’ve previously dyed your hair black, it’s best to skip the bleach bath and opt for a gentle colour remover first. This will help you avoid unwanted reactions and keep your hair healthy.
Hair Bleach Maintenance and Aftercare
So you’ve taken the plunge and bleached your hair – now what? Maintaining your new ‘do involves more than just washing and conditioning.
Here’s the lowdown on aftercare, from nourishing those tresses to protecting your colour.
Washing and Conditioning
Now, the fun part – washing out the bleach. This is when you’ll see the full transformation and can admire your handiwork. But don’t get too carried away; it’s important to be gentle and thorough when washing out the bleach to avoid any irritation or damage. Follow up with a nourishing conditioner to replenish moisture and keep your hair happy.
Moisturizing and Nourishing
Bleaching can be a drying process for your hair, so it’s important to focus on hydration and nourishment post-bleaching. Here are some tips to help you out:
- Go for moisturizing shampoos and conditioners.
- Use a hair mask or deep conditioner once a week to really nourish those locks.
- Try a leave-in conditioner for extra moisture.
- Avoid heat styling as much as possible to prevent further damage.
Protecting From Damage
Bleach can be harsh on your hair, so it’s important to take steps to protect it from damage. Here are some tips to keep your hair healthy:
- Avoid over-processing: Don’t be tempted to leave the bleach on for longer than instructed. Set a timer and keep an eye on it to avoid over-processing, which can lead to breakage.
- Rinse thoroughly: Make sure to rinse your hair with cool water for at least 5 minutes to remove all traces of bleach.
- Condition, condition, condition: Deep condition your hair after bleaching to restore moisture and prevent dryness. Use a good-quality conditioner and leave it on for a few minutes to let your hair soak up the nourishment.
Follow-up Appointments
Bleached hair requires regular upkeep to maintain its color and health. Here’s the lowdown on follow-up appointments:
- Color correction: If your hair turns out brassy or uneven, don’t freak out. A colorist can work their magic and correct the color, getting you back on track.
- Toner top-ups: Toner helps nix unwanted tones and keeps your hair looking fresh. Think of it as a refresh button. You might need to reapply toner every few weeks to maintain your dream shade.
- Root touch-ups: As your hair grows, those roots will start peeking through. You can either DIY or hit up a salon to touch up those roots and keep your hair looking on point.
Frequently Asked Questions (FAQs)
What’s the best bleach to use for hair?
The best bleach for your hair depends on its current colour and condition, your desired results, and application technique. Wella Professionals Blondor Lightening Powder is a top choice for its gentle formula and anti-yellowing agents.
Which hair bleach is least damaging?
You want to lighten your locks without frying them? Go for L’Oréal Quick Blue Powder Bleach. It’s dust-free, non-drip, and lightens hair up to two shades, so it’s gentle on your tresses.
What bleach do hair professionals use?
Hair professionals use a variety of bleaches, including Wella Blondor, Schwarzkopf BlondeMe, L’Oreal, Clairol, and Sparks Professional Color Powder Lightener.
What is the best bleach for color correction?
If you’re facing a hair color disaster, it’s best to leave fixing it to the pros. Hair color correction services are available at top salons to fix any bleaching or coloring gone wrong. You can book a consultation to get expert advice.
How long should I wait to bleach my hair again?
It’s recommended that you Wait at least two to four weeks before bleaching your hair again, but the longer you can wait, the better. Back-to-back bleaching can cause severe damage.
Can I bleach my hair twice in one day?
Technically, yes, but hair professionals advise against it. Bleaching twice in one day increases the risk of over-processing, which can lead to breakage and split ends.
What happens if you bleach hair that has already been bleached?
You can bleach hair that’s already been bleached, but you need to be careful. Wait at least two weeks between bleaching sessions. If your hair is damaged, don’t bleach it again.
How long does it take to bleach hair?
So, you want to go blonde, but how long will it take? Well, it depends. The time varies based on your hair type and the shade you’re aiming for. Generally, it takes 15-45 minutes, but don’t go beyond an hour.
What volume developer to bleach hair?
It depends on the look you want to achieve. A 30-volume developer will lighten your hair by three or four tones, while a 40-volume developer will take your hair up to four levels lighter.
Conclusion
Choosing the best bleach for your hair involves considering your hair type, its current condition, and the results you desire.
Whether you’re going for a bold, dramatic look or a subtle, sun-kissed vibe, selecting the right hair bleach kit and understanding the bleaching process are key.
With the right products, techniques, and aftercare, you can achieve and maintain gorgeous bleached locks that turn heads and showcase your unique style.

