This site is supported by our readers. We may earn a commission, at no cost to you, if you purchase through links.
Bleaching dark hair requires precise timing and preparation.
Depending on the hair’s condition and desired level of brightness, the process can take anywhere from 30 minutes to several hours.
You’ll need to closely monitor your hair during bleaching, adhering to maximum time limits of around 30 minutes.
Adjust timing based on your hair type for the best results.
After bleaching, proper aftercare like deep conditioning treatments and specialized shampoos are essential.
For a complete guide on how long it takes to bleach dark hair effectively and safely, additional details await.
Table Of Contents
- Key Takeaways
- How Long Does It Take to Bleach Black Hair?
- Essential Tools for Bleaching Black Hair
- Preparing Your Hair for Bleach
- The Bleaching Process
- Timing Your Bleach Application
- Aftercare for Bleached Hair
- Do’s of Bleaching Black Hair
- Don’ts of Bleaching Black Hair
- Understanding Bleaching Hazards
- Choosing Between Home and Salon Bleaching
- Frequently Asked Questions (FAQs)
- Conclusion
Key Takeaways
- Bleaching black hair requires careful timing and preparation, with the process taking anywhere from 30 minutes to several hours depending on the desired level of brightness.
- A hair bleach kit containing bleaching powder, developer, and other essential supplies is necessary for bleaching black hair. Protective gear like gloves and an old shirt or cape is also required.
- After bleaching, proper aftercare like deep conditioning treatments and specialized shampoos is essential to maintain healthy hair.
- Bleaching black hair involves the use of chemicals that can cause loss of pigment, weakening, excessive porosity, and loss of keratin. To minimize risks, patch test for allergies, avoid bleaching damaged hair, read instructions meticulously, and wear protective gear.
How Long Does It Take to Bleach Black Hair?
The time it takes to bleach black hair can vary from one day to a month, with each bleaching session lasting between 15 and 30 minutes. Factors like hair color, texture, and desired shade influence the duration and number of sessions needed.
Essential Tools for Bleaching Black Hair
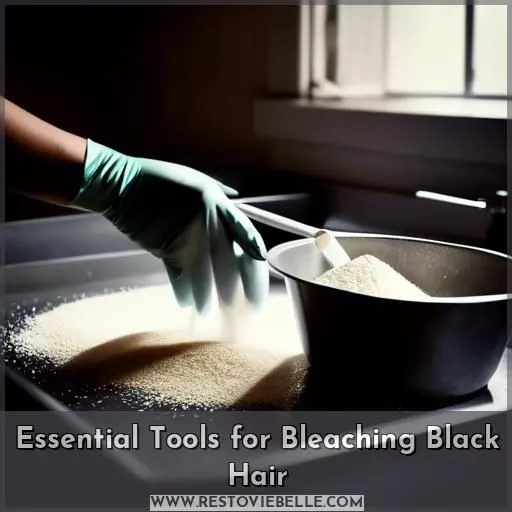
You’ll need a hair bleach kit containing bleaching powder, developer, and other essential supplies. Protective gear like gloves and an old shirt or cape is vital to safeguard your skin and clothing from the harsh chemicals involved.
Hair Bleach Kit
Bleaching black hair necessitates the correct tools and precautions to guarantee a successful and hazard-free process. A hair bleach kit is fundamental, which customarily involves bleaching powder, a tinting brush, and a plastic cup or transparent plastic bag for mixing. In addition, protective gear like plastic gloves and a glass or plastic bowl are requisite to prevent skin contact and minimize mess.
When utilizing a hair bleach kit, remember to conduct a patch test 48 hours prior to application to guarantee no allergic reactions exist. Section your hair into manageable parts to apply the bleach evenly. Mix the bleaching powder according to the instructions provided, ensuring not to leave it on for an excessive amount of time to avoid damage.
After bleaching, adhere to aftercare tips to maintain healthy hair. Trim your hair within a week to remove damaged ends. Alternate between conditioners and moisture/protein shampoos to keep your hair hydrated. Wait a couple weeks before using purple shampoos to restore your hair’s natural color. Invest in proper hair care treatments and use shampoos and conditioners formulated for bleached hair.
Bleaching black hair may be a hazardous process, as it involves the use of chemicals that can cause loss of pigment, weakening, excessive porosity, and loss of keratin. To minimize risks, patch test for allergies, avoid bleaching damaged hair, read instructions meticulously, and don protective gear. Be gentle with curly hair and use pre-shampoo conditioners and post-color treatments.
When choosing between home and salon bleaching, consider the advantages of professional services, such as full coverage and after-color treatments, versus the cost-effectiveness and convenience of DIY bleaching. Always consult with a hairdresser for guidance on bleaching and hair care.
Protective Gear
Protective gear is essential when bleaching black hair. It includes items like plastic gloves, a glass/plastic bowl, a tinting brush, and a plastic cup or transparent plastic bag. These tools help prevent allergies, chemical burns, and hair damage. When bleaching at home, always wear protective gear to minimize risks associated with DIY bleaching. Remember, safety first!
Preparing Your Hair for Bleach
Before using bleach on your hair, it’s essential to do a patch test 48 hours beforehand to make sure you’re not allergic to it. Dividing your hair into manageable sections helps make sure you apply the bleach evenly and avoids overlapping, which could cause damage.
Conducting a Patch Test
Before starting the process of lightening your dark hair, it’s essential to perform a patch test to confirm that your hair and scalp are prepared for the procedure. A patch test aids in detecting possible allergic reactions or sensitivity to the bleach, thereby preventing any undesirable side effects.
Here’s a step-by-step guide to conducting a patch test:
- Select the appropriate time: Plan your patch test at least 48 hours before your intended bleaching session. This allows sufficient time for any reactions to develop and be examined by a professional.
- Gather necessary materials: Acquire a patch test kit, which usually contains various allergens and a tape-like adhesive to attach the patches to your skin.
- Apply the patches: Follow the instructions provided with your patch test kit to apply the allergens to your skin. Typical areas for patch tests include the upper back or inner arm.
- Monitor the patches: Observe your skin for any signs of irritation, redness, or itching during the 48-hour period. If you notice any adverse reactions, promptly inform your dermatologist or allergist.
- Return for a follow-up: After the 48-hour period, return to your healthcare provider for a follow-up appointment. They’ll evaluate your skin and discuss the results with you.
Sectioning Hair
To prepare your hair for bleaching, you’ll need to section it appropriately. This step is essential for uniform application of bleach and to avoid damage. Here are three tips to help you section your hair effectively:
- Parting lines: Begin by creating a distinct parting line down the center of your head. This will guide you in dividing your hair into sections.
- Section pattern: Divide your hair into smaller sections, working from the back to the front. This way, you can guarantee that you don’t overlook any areas and that the bleach is distributed evenly.
- Hair division: Utilize clips or hair ties to fasten each section as you work. This will assist you in tracking where you’ve applied bleach and facilitate moving on to the next section.
The Bleaching Process
Preparing the bleaching powder is a critical step that necessitates accurate measurements and meticulous mixing to guarantee uniform application. Appropriate application method includes dividing the hair, distributing the bleach mixture from roots to tips, and periodically assessing for desired lightness.
Mixing Bleaching Powder
Concerning bleach preparation, obtaining the correct mixing proportions is akin to discovering the ideal recipe for a culinary masterpiece. You’re the chef in your hair care kitchen, and the bleach is your primary ingredient. Developer strength is your loyal companion, determining the extent of lightening for your locks. Bear in mind that this mixture is potent—consider oxidizing agents as the flame that ignites your new hue. Select your toner like you’d choose a fine wine, complementing the overall result. Excessive use risks a hair catastrophe, so measure meticulously and strive for the ideal balance where color aspirations are realized. Keep a deep conditioning treatment in reserve—your post-bleach indulgence will express gratitude. And conceal those purple shampoos for the ensuing weeks; they’re the clandestine ingredient for preserving your cool, crisp blonde.
Here’s a concise table to guide you through the mix:
| Developer Volume | Hair Level | Expected Lightening |
|---|---|---|
| 10 Vol | Dark | 1 Level |
| 20 Vol | Medium | 2 Levels |
| 30 Vol | Light | 3 Levels |
| 40 Vol | Very Light | 4 Levels |
| Toner | Desired | Color Correction |
Mix wisely, and you’ll embark on the path to a mane that’s both fierce and fabulous.
Application Technique
Lightening black hair can be a complicated process, but with the proper equipment and methods, you can obtain your desired blonde hue. Here’s a step-by-step guide to assist you in applying bleach to your hair safely and successfully:
- Prepare Your Hair: Begin by conducting a patch test 48 hours before bleaching to guarantee you’re not allergic to the bleach. Then, wash your hair thoroughly and dry it.
- Section Your Hair: Divide your hair into sections using clips or hair ties. This will make it easier to apply the bleach evenly and avoid any harsh lines.
- Mix Your Bleach: Follow the instructions on your bleach kit to mix the bleaching powder with a developer. Be sure to wear gloves and work in a well-ventilated area.
- Apply the Bleach: Using a tinting brush or your fingers, apply the bleach mixture to your hair. Start at the roots and work your way down to the ends. Be sure to saturate all areas of your hair evenly.
- Monitor Your Hair: Keep an eye on your hair as it processes. Check for lightness after 10 minutes, and then every 5 to 10 minutes until you reach the desired shade. Remember, the maximum time to leave bleach on your hair is 30 minutes.
- Rinse and Condition: Once you’ve reached your desired shade, rinse the bleach out thoroughly with water. Then, apply a deep conditioning treatment to restore moisture and protect your hair.
Timing Your Bleach Application
One of the most critical aspects of bleaching black hair is timing your bleach application correctly. The maximum recommended time for leaving bleach on black hair is 30 minutes, but this can vary based on your hair’s natural color, texture, and whether it has been previously colored.
Maximum Time Limits
Bleaching black hair requires careful consideration of the timing to minimize damage and guarantee the best results. The maximum time limit for bleaching hair is generally around 30 minutes, but this can vary based on factors such as hair color, texture, and previous coloring. Longer bleaching times increase the risk of damage, so it’s essential to monitor the hair closely and follow the instructions provided with the bleaching kit.
To determine the best bleaching time for your hair, consider conducting a strand test before applying the bleach to your entire head. This will help you gauge the desired lightness and ensure you don’t leave the bleach on for too long, which can lead to excessive damage. Remember that the length of time you leave the bleach on your hair will directly impact the final color and the health of your hair.
When bleaching black hair, it’s important to be patient and cautious. Rushing the process or over-processing the hair can result in brittle, dry strands and breakage. Always read the instructions carefully and consult with a professional if you’re uncertain about the bleaching process or the specific products you’re using.
Adjusting Time for Hair Type
Adjusting the bleaching time for dark hair relies on several variables, including hair porosity, texture differences, and protein loss. If your hair is highly porous, it may absorb color quickly but may not retain it for long, resulting in faster fading. In this case, you should reduce your bleaching process to 10 to 15 minutes to achieve more vibrant and even color. On the other hand, low-porosity hair may require longer processing times, as it can be more resistant to absorbing color.
It’s essential to take into account your hair’s natural texture and color history when adjusting bleaching time. For example, fine hair with a thinner cuticle layer may process faster, while coarse hair with a thicker cuticle layer may need more time. Additionally, if your hair has been previously colored, it may take longer to process the bleach, and you may need to divide the process into several sessions.
To minimize damage and achieve even color distribution, it’s critical to follow the instructions included with your hair bleach kit and perform a strand test before applying bleach to your entire head. This will help you determine the ideal time for bleaching your hair based on your specific hair type and condition.
Aftercare for Bleached Hair
After the bleaching process, you’ll want to trim your hair within a week to remove damaged ends and invest in proper hair care treatments. These should include alternating between moisture/protein shampoos and conditioners formulated specifically for bleached hair to replenish nutrients and prevent further damage.
Trimming and Treatment
After bleaching your black hair, it’s essential to preserve its vitality and avert deterioration. Here are four recommendations for hair upkeep:
- Trim within a week of bleaching to eliminate split ends and uphold healthy hair.
- Rotate between conditioners and hydrating/protein shampoos to maintain your hair’s moisture and resilience.
- Delay using purple shampoos for several weeks to prevent excessive manipulation of your hair.
- Acquire appropriate hair care remedies, such as deep conditioning treatments, pre-shampoo conditioners, and post-color treatments, to nurture your bleached hair.
Shampoo and Conditioner Selection
To maintain the vibrancy and health of bleached hair, it’s crucial to use the appropriate shampoo and conditioner. The following table provides a list of suggested products for various hair care requirements:
| Product | Description |
|---|---|
| Moisturizing Shampoo | For regular use, these shampoos help preserve the health of bleached hair without removing its natural oils. |
| Protein Shampoo | Used with less frequency, these shampoos help fortify and repair damaged hair by supplying essential proteins. |
| Purple Shampoo | Specifically formulated for blonde hair, these shampoos neutralize undesired yellow tones and help maintain the preferred blonde shade. |
| Hair Treatments | Regular application of hair treatments can help restore the moisture and strength of bleached hair, preventing damage and breakage. |
Do’s of Bleaching Black Hair
Prior to bleaching black hair, it’s essential to establish your intended blonde shade, whether it be warm, cool, or ashy tones. Following bleaching, employing deep conditioning treatments featuring moisture-rich and protein-infused formulas will assist in restoring damage and preserving hair health.
Selecting a Blonde Shade
To achieve the perfect blonde shade for your black hair, follow these simple steps:
- Know your hair color and tone: Understand your natural hair color and the tone of your hair. This will help you choose a blonde shade that complements your skin and eye color.
- Choose a desired blonde shade: Select a blonde shade that suits your preferences and the level of lightness you desire. Consider factors such as your hair texture and porosity.
- Care for bleached hair with deep conditioning treatments: Regularly use deep conditioning treatments to help maintain the health and integrity of your bleached hair.
- Use shampoos and conditioners formulated for bleached hair: Choose products specifically designed for bleached hair to provide proper care and maintenance.
- Give hair time to recover: Allow your hair to rest and recover between bleaching sessions to prevent damage and maintain its health.
Deep Conditioning Treatments
After bleaching, protecting hair is paramount. You’ll want to lavish your locks with nourishing hair treatments that restore moisture and resilience. Pre-shampoo care with deep conditioners can work wonders, as can post-color treatments designed to seal and heal. Think of these as your hair’s personal bodyguards, keeping it safe from the harsh elements of styling and the outside world.
| Treatment Type | Frequency | Benefit |
|---|---|---|
| Deep Conditioner | Weekly | Replenishes moisture |
| Protein Treatment | Bi-weekly | Strengthens strands |
| Hair Mask | As needed | Intensive repair |
| Leave-in Conditioner | Daily | Continuous protection |
| Oil Treatment | Pre-shampoo | Adds shine & softness |
Don’ts of Bleaching Black Hair
One of the biggest mistakes to avoid when bleaching black hair is over-processing the hair by leaving the bleach on for too long.
This can lead to severe damage, breakage, and even hair loss.
Another critical mistake to avoid is ignoring the strand test and bleaching without checking how your hair will react.
This could result in an uneven or brassy color and compromised hair integrity.
Over-processing
Over-processing your hair can lead to severe damage, including melting, burning at the root, and disintegration at the ends. To prevent over-processing, follow these precautions:
- Know your hair type: Understand your hair’s natural texture, porosity, and previous coloring to determine the appropriate bleaching time and intensity.
- Use a hair bleach kit: Choose a kit that includes all the necessary tools and products for safe and effective bleaching.
- Conduct a patch test: Before applying bleach to your entire head, test it on a small section to make sure you’re not allergic to the chemicals.
- Divide your hair: Section your hair into smaller parts to guarantee even coverage and prevent over-processing.
- Mix bleaching powder: Follow the instructions carefully to avoid leaving the bleach on for too long.
- Apply bleaching powder: Use a tinting brush to apply the bleach evenly, avoiding the roots and scalp.
- Monitor lightness: Check your hair regularly during the bleaching process to make sure you’re not going too light or too dark.
- Use aftercare products: Invest in proper hair care treatments, such as conditioners and shampoos formulated for bleached hair.
Ignoring Strand Tests
Regarding the bleaching of dark hair, following specific steps is pivotal for a favorable and secure process. One critical step that mustn’t be neglected is conducting a strand test. This simple yet fundamental step can help avert hair damage, chemical burns, and other potential risks associated with bleaching. Here’s why a strand test is always advisable before bleaching your hair:
-
Evaluating Hair Condition: A strand test enables you to assess the condition of your hair, which can influence the bleaching process. If your hair is damaged or weakened, it may not tolerate the bleach effectively, resulting in breakage or excessive harm.
-
Determining Processing Time: Strand tests assist in determining the optimal processing time for the bleach, ensuring that it isn’t left on for an extended period, which can cause damage or chemical burns.
-
Preventing Uneven Color: Strand tests reveal how the bleach will interact with your hair, preventing uneven color or texture alterations. This can spare you the need for additional treatments or the disappointment of an unsatisfactory result.
Ignoring a strand test can lead to various issues, including hair breakage, over-processing, and potential allergic reactions. It’s vital to prioritize the health and safety of your hair by taking the time to perform a strand test before bleaching.
Understanding Bleaching Hazards
Bleaching black hair carries significant risks, including potential damage to the hair’s cuticle and cortex, leading to excessive dryness, breakage, and a compromised overall structure. Additionally, the harsh chemicals involved in the bleaching process can cause chemical burns to the scalp if not handled with proper precautions and care.
Potential for Damage
Bleaching your hair can have significant impacts on its health and appearance. The process of bleaching involves the removal of natural proteins from the hair, which can lead to damage to the cuticle and internal structures of the hair. This can result in dry, damaged-looking hair with breakage over time. Bleaching also increases the porosity of the hair, making it more vulnerable to styling and prone to frizz.
Moreover, bleaching can cause chemical burns on the skin, especially on the scalp, face, and neck. It can also lead to temporary or permanent hair loss and scarring of the scalp. To minimize these risks, it’s important to have a patch test done before bleaching to check that the formulas being used are tolerated.
In addition to these risks, bleaching can cause protein loss and moisture loss, which can lead to a loss of elasticity and reduced shine in the hair. It’s necessary to use color-safe hair care products after bleaching to help strengthen the hair and address these new characteristics.
To mitigate the potential damage caused by bleaching, it’s recommended to consult a professional colorist for the bleaching service, as they can expertly apply the bleach to avoid overlap on previously bleached strands. After bleaching, it’s important to avoid shampooing, blow drying, brushing, or styling the hair for a few days, especially if there’s evidence of hair breakage.
Chemical Burn Risks
Bleaching your hair involves chemical reactions that can cause allergic responses or damage to your hair.
To minimize these risks, always conduct a patch test before bleaching.
Read the instructions carefully and wear protective gear.
If you experience any discomfort or irritation during the process, stop immediately and seek professional advice.
Essential precautions are vital to ensure a successful bleaching experience.
Choosing Between Home and Salon Bleaching
When deciding whether to bleach your hair at home or at a salon, consider the benefits of professional services. Stylists have expertise in handling potent chemicals and tailoring the process to your hair type, ensuring even coverage and minimizing damage.
Benefits of Professional Services
When you’re aiming for perfect blonde hair, don’t take risks at home.
Head to the salon for a professional consultation.
Salon experience guarantees you’re in safe hands, with customized color coverage designed just for you.
The stylists have mastered the art of chemical handling, so you can sit back and relax, knowing your locks are getting the VIP treatment.
Plus, you’ll leave with post-color treatments that’ll keep your hair looking like a million bucks.
Considerations for DIY Bleaching
Bleaching your black hair at home can be a budget-friendly option to salon services. Here are some factors to consider for a successful result:
- Brush Application: Use a tinting brush for controlled application and even distribution.
- Bleach Application: Apply bleach in sections, starting from the ends and working your way to the roots.
- Hair Texture: Adjust bleaching time based on your hair’s texture and previous coloring.
- Pre-Treatment: Consider a pre-treatment, such as a deep conditioner, to prepare your hair for bleaching.
- Nourishment: Post-bleaching, use nourishing shampoos and conditioners designed for bleached hair to maintain your new color and protect your hair’s health.
Frequently Asked Questions (FAQs)
Can bleaching cause long-term scalp issues?
Yes, bleaching can lead to long-term scalp issues if you’re not careful. The harsh chemicals can irritate and damage your scalp, leading to dryness, redness, and even hair loss if done incorrectly or too frequently. Always take precautions and give your scalp a break between bleaching sessions.
How does bleaching affect hair growth?
25% of women report thinning after bleaching. But don’t fret – it’s often temporary. Bleach weakens strands, causing breakage and slowed growth. Proper care with bond rebuilders and weekly masques will keep your mane flourishing.
Are organic bleaching alternatives effective?
Go for organic alternatives if you’re health-conscious and want vibrant results without compromise. While effective, these gentle plant-based formulas may require extra processing time – totally worth it for luscious, nourished locks! Indulge in a pampering salon service or DIY with quality products.
Can bleached hair be permanently straightened?
Yes, you can straighten bleached hair permanently, but be cautious. Bleaching damages strands, making them prone to breakage from intense heat styling. Consider semi-permanent straightening methods or deep conditioning treatments to restore strength before permanent straightening.
How to manage bleaching-induced frizz?
You’ve got some mad frizz after bleaching, right? No worries, tame those locks with a deep conditioning mask – slather it on and let it work its magic. Finish with a smoothing serum for sleek, gorgeous strands.
Conclusion
From the journey of carefully preparing your hair to the intricate art of controlling the bleaching process, overcoming the challenge of how long it takes to lighten dark hair is no easy feat.
However, with a steadfast commitment to following the guidelines, exercising caution, and investing in proper aftercare, you can reveal your desired blonde shade while preserving your tresses’ integrity.

