This site is supported by our readers. We may earn a commission, at no cost to you, if you purchase through links.
 Taming your unruly curls can be tricky. But with the right techniques and products, you can get perfectly straight and frizz-free hair in no time! That’s why we’re here to show you how to straighten frizzy hair safely and effectively — so that every day is a good hair day.
From heat protectant sprays to flat ironing tips, learn all about taming those wild locks in six easy steps (plus some extra insider tips). We’ll also explore different methods of hair straightening like thermal reconditioning, chemical relaxing, as well as keratin treatments for long-lasting results.
Let’s start by getting ready for the big transformation!
Table Of Contents
- Key Takeaways
- Step 1: Wash and Condition
- Step 2: Detangle With Wide Toothed Comb
- Step 3: Apply Heat Protectant
- Step 4: Blow Dry With Diffuser
- Step 5: Choose the Right Hair Straightener
- Step 6: Finish With Setting Spray or Serum
- Tips for Safely Straightening Curly Hair
- Don’t Treat All Curl Patterns Equally
- Start With Freshly Washed Hair
- Always Detangle Before Applying Heat
- Prep Hair Before Blow-Drying
- Blow-Dry in the Right Direction
- Choose a Flatiron With Temperature Control
- Use as Little Heat as Possible
- Limit Pre-Straightening Products
- Never Skip Heat Protectant
- Work in Small Sections
- Limit Post-Straightening Products
- Seal Style With Hairspray
- Avoid Tying Hair Up Immediately After Straightening
- Sleep on Hair the Right Way
- Different Methods of Hair Straightening
- Frequently Asked Questions (FAQs)
- Conclusion
Key Takeaways
- Choose the right products for your hair type and use a heat protectant.
- Detangle hair before applying heat and work in small sections for even straightening.
- Use a flat iron with ceramic plates and temperature control on the lowest setting.
- Apply minimal styling products and finish off with a setting spray or serum for hold and shine.
Step 1: Wash and Condition
Before beginning to style your locks, it’s important to wash and condition with the right shampoo and conditioner for your hair type to help prevent frizz. Use lukewarm water when rinsing out the product, as hot water can strip natural oils from your hair.
Towel dry gently using a microfiber towel or t-shirt before detangling carefully with a wide-tooth comb or wooden brush.
After drying, apply heat protectant spray in sections followed by leave-in conditioner if needed. Both will help guard against damage from heated styling tools like flat irons and blow dryers.
Remember that you don’t need tons of products before straightening either – just enough for coverage without weighing down strands too much is key here! Finally, take extra care not only while applying heat but also afterwards by brushing lightly with a boar bristle brush.
Step 2: Detangle With Wide Toothed Comb
Use a wide-toothed comb to gently detangle your locks, and then you’ll be ready for the rest of the straightening process.
To reduce frizz during this step, make sure to towel dry your hair with a microfiber cloth and use conditioner before beginning.
Afterward, section off small chunks of hair about one inch in widths so that each part is easier to manage when using the flat iron later on.
Finally, finish up by lightly spraying setting spray over sections or applying some leave-in conditioner or serum for extra shine and protection from humidity: both will help keep flyaways at bay throughout the day!
Step 3: Apply Heat Protectant
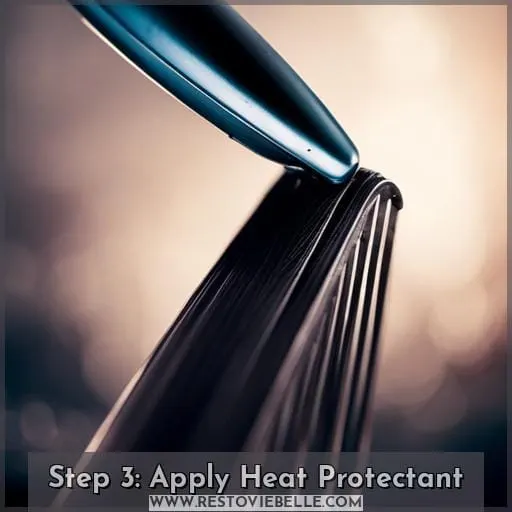
Spray a heat protectant on your locks before styling to keep them looking healthy and glossy. Heat protection is an essential step for anyone who uses heat tools, like flat irons and curling wands, or wants to style their hair with blow dryers or hot rollers.
A good quality heat-protecting spray will create a barrier between the hot tool’s plate and your hair strands so that they don’t become damaged from too much exposure. Different curl patterns may require different techniques when it comes to straightening, so make sure you use the right products for maximum effect.
Before applying any type of product, deep condition your hair first in order to repair any damage caused by previous styling sessions.
When you’re ready to begin straightening, choose high-quality ceramic-based heating plates which come equipped with temperature control settings. Aim for a 300–350°F (150–175°C) range, depending on how thick/fine/coarse your hair is.
Then section off small chunks about 1 inch wide before starting work on each one individually.
Step 4: Blow Dry With Diffuser
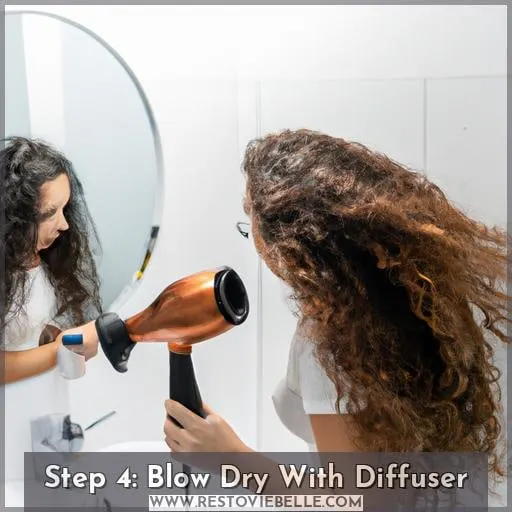
Gently dry your hair with a diffuser attachment, pointing the nozzle down to encourage cuticles to lay flat. To reduce frizz while blow drying, use a heat protectant spray before starting. Select the lowest level of temperature and keep it consistent throughout styling.
Divide your hair into small sections for effective results with each curl pattern type.
When looking for a hairstyle that is straight, smooth, and free from frizz, using this technique will ensure you get long-lasting results – even through humidity! Start by selecting ceramic plates on an adjustable heat setting between 300-350°F when using any flat ironing tool.
This prevents unnecessary damage due to overheating or incorrect temperature levels being used on different curl patterns/textures of hair types. When finished styling, use either hairspray or serum depending upon the desired look, along with keratin treatments if necessary, to promote longer-lasting styles after trying various straightening techniques such as the chase method combined with rattail comb and paddle brush pulls.
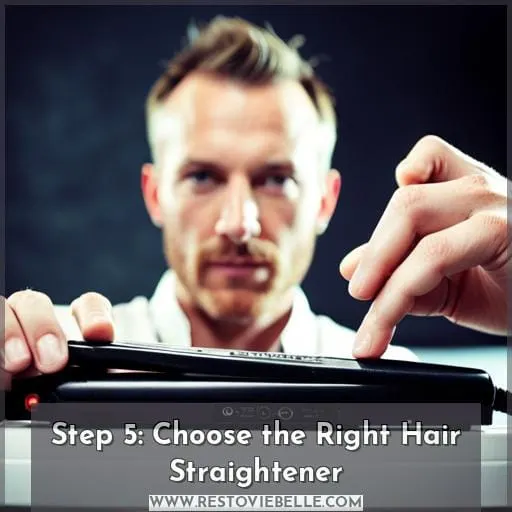
Step 5: Choose the Right Hair Straightener
Choosing the right hair straightener is key to achieving smooth, frizz-free locks. Look for a flat iron with ceramic plates and negative ion technology, as these produce less heat damage than steel plates while locking in moisture and shine.
Choose one with multiple heat settings so you can adjust it according to your hair type. For fine or color-treated strands, use 300°F, for normal textures like straight or wavy types 3A–3C, use 350°F, and for curly 4A–4C types which are more resistant to styling, use 400°F+.
Before using any heated tool on your mane, make sure that there is a layer of protection between them. Use a nourishing leave-in conditioner, then spray some heat protectant before blow drying and additionally when using the flat iron itself.
A natural bristle brush helps pull sections of hair taut while directing air flow downwards towards the ends instead of up at roots. This reduces split ends caused by overexposure from too much hot air. Finish off with setting spray or serum after each section has been completed.
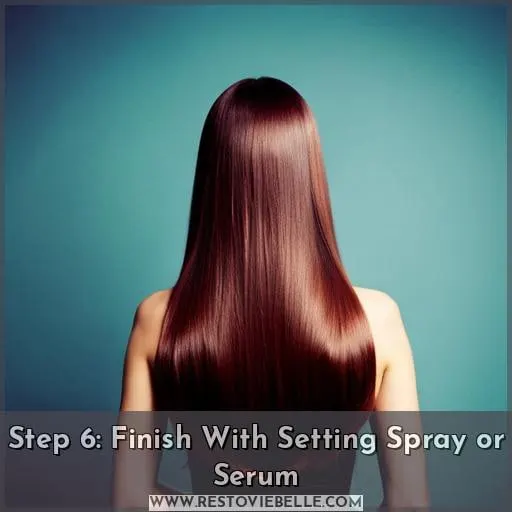
Step 6: Finish With Setting Spray or Serum
Once you’ve chosen the right flat iron, it’s time to finish off with a setting spray or serum. A heat protectant will help strengthen protein bonds in your hair and keep it healthy while styling.
Start by blow drying your hair and make sure each section is completely dry before using a flat iron to straighten it.
Hair serums can also help lock in moisture into the cuticle layer throughout the day so you don’t have to worry about frizz showing up again later on. Setting sprays provide an extra level of control as they create an invisible barrier between humidity outside and any flyaways inside, preventing them from ruining your look over time.
Choose one based on what suits best for you – try out different products until you find one that works well with both protecting against heat damage as well as keeping frizz at bay without weighing down locks too much! With these steps followed consistently every single time when styling, achieving beautiful long-lasting styles would become effortless, giving complete understanding and freedom from unwanted frizzy days!
Tips for Safely Straightening Curly Hair
Straightening curly hair can be tricky, but it doesn’t have to be! To ensure you achieve sleek locks without damaging your hair, don’t treat all curl patterns equally.
Start with freshly washed hair and detangle before applying heat. Prep your strands by blow-drying in the right direction using a flat iron with temperature control and as little heat as possible.
Make sure to apply a heat protectant if working with hot tools. Then divide into small sections for better coverage when straightening, limiting pre-straightening products used beforehand too!
Afterwards, seal the style with hairspray and avoid tying up immediately after straightening. Opt for sleeping on silk or satin instead of cotton pillowcases for best results.
Don’t Treat All Curl Patterns Equally
Different curl patterns require special care when straightening. Heat protectant, brushing techniques, and product limitations vary by type of hair. Straightening methods like blow drying, Japanese or Brazilian treatments should be tailored to the individual’s curls for the best results.
Start With Freshly Washed Hair
Before embarking on straightening, ensure you start with freshly washed tresses.
Start by balancing the hair’s pH levels with a shampoo and conditioner specially designed for curly locks. Select products that are sulfate-free and nourishing to keep frizz at bay. Use lukewarm water when rinsing, as hot water can strip away natural oils from your scalp and strands leading to dryness or breakage in the future.
Towel dry gently using a microfiber cloth for extra protection against damage before styling damp hair will help maintain moisture—avoid blow drying wet hair! Follow up these steps by applying deep conditioners once every week or two weeks depending on how much protein it needs; use heat protectant sprays when necessary; brush regularly but avoid harsh pulling of bristles; sleep with silk bonnets or pillowcases so that all efforts won’t be wasted overnight due to friction caused between cotton fibers and curls causing them back into their original shape again!
Visit salons if needed for treatments like Brazilian treatment which provide perfect permanent straightening but check temperature settings beforehand since high temperatures can cause excessive damage leaving you worse than before!
Table: Hair Care
│ Wet/Damp Hair
│ Silk Pillowcase
│ Hair Salon
Always Detangle Before Applying Heat
Gently detangle your curls with a wide-toothed comb or your fingers before applying heat. Flat brushing, blow-drying, and braiding techniques can also help reduce frizz. Use anti-frizz serums, claw clips, silk hair ties, and heatless straightening methods to further tame the mane.
Prep Hair Before Blow-Drying
Prep your hair for blow-drying by using a comb or your fingers to detangle it before you wrap it in a microfiber towel. Protect it with heat protectant, then use a round brush and low heat to section the hair.
Sleep with a silk scarf or bonnet, satin pillowcases, and velcro rollers to keep the natural oils intact! Use a rattail comb for the chase method when straightening.
Blow-Dry in the Right Direction
Start blow-drying by pointing the nozzle down; move in a fluid motion to seal the cuticles. Use heat protection, a round brush, and leave-in conditioner; nourishing mask and silk wraps. Blow-dry in the right direction with a flatiron at the lowest temperature possible on completely dry hair: limit pre-straightening products.
Choose a Flatiron With Temperature Control
Choose a flat iron with temperature control to keep your hair healthy and safe while you style it. Heat styling can cause damage, so look for ceramic plates and negative ion technology. Adjust the heat to avoid damaging your hair shaft, then use products to protect it further.
| Heated Styling | Avoid Damage | |
|---|---|---|
| Ceramic Plates | Temperature Control | |
| Negative Ions | Styling Products | |
| Silk Scarf | Hair Treatment | |
| Temperature Control | – | – |
Use as Little Heat as Possible
Set your flat iron to the lowest heat and glide it quickly over sections for a smooth finish. Protect hair cells with a heat protectant and leave-in conditioner for luscious locks. A silk scarf can help maintain keratin levels, forming a moisture barrier to keep a shiny finish.
Use a round brush instead of a flat one before straightening; this will aid in controlling heat application while preserving the structure of hair cells.
Limit Pre-Straightening Products
Limit the number of products you use before straightening; opt for ceramic plates with temperature control, use serums to maintain moisture.
Never Skip Heat Protectant
Always apply a heat protectant before straightening for healthy curls. Use a round brush and flat iron on low heat. Work in small sections, applying leave-in conditioner and a silk bonnet after styling to protect the hair structure from damage.
Work in Small Sections
Divide hair into small sections before straightening for even heat and styling. Start with a few strands in the back or sides of the head to practice. Use heat protectant, a wide-toothed comb, a temperature control flat iron, and a microfiber towel.
A frizz-fighting duo and setting spray keep hair smooth. Lift every strand with a flatiron and use sulfate-free products for best results.
Limit Post-Straightening Products
Use only a minimal amount of styling products after straightening your hair for the best results. For wavy and curly hair, opt for heat protectants before blow-drying and flat ironing. Secure with a silk scarf or pillowcase while sleeping to avoid post-straightening mistakes.
Afterwards, use the cool setting on the dryer with a flat paddle brush and a smoothening mask to finish off the style without extra product buildup.
Seal Style With Hairspray
Finish off with a spritz of hairspray to keep your style in place. Use sealing techniques like the chase method, and protect hair at night with heat protectant products. Temperature control is key for frizz-free hair; use styling product sparingly and brush technique correctly.
Chemical straightening can help maintain smoothness for longer periods, but follow-up care is also essential for healthy hair growth.
Avoid Tying Hair Up Immediately After Straightening
Avoid pulling up your hair after straightening to prevent bumps. Use a heat protectant, cool setting, silk bonnet/pillowcase for avoiding damage and achieving coily hair goals.
List:
- Heat Protectant
- Cool Setting
- Silk Bonnet/Pillowcase
- Coily Hair Goals
To keep your style in place without incurring any heat damage or frizziness afterwards, it is important to avoid tying up your hair immediately after you’ve finished straightening it with a flat iron or blow dryer.
This will help ensure that the look you achieved stays in place for as long as possible and prevents kinks from appearing when attempting to put your locks into an updo later on down the line.
Make sure that before starting the process of styling with heated tools, you apply a protective product like hairspray or serum so that no additional harm comes to already-frizzy strands while trying to achieve smoothness and sleekness.
Additionally, using products such as silk bonnets or pillowcases can help keep humidity out throughout the night, thus ensuring that every morning brings fresh-looking locks right back into shape again! Finally, pay attention not only during application but also when selecting tools used.
Sleep on Hair the Right Way
To maintain the best appearance of your hair, sleep with a silk bonnet or use satin pillowcases to prevent damage and retain moisture. For frizz-free locks, try the chase method for added protection. Additionally, a nourishing hair mask and setting spray can help protect curls overnight.
| Silk Bonnet | Satin Pillowcase | Chase Method | Hair Mask | Setting Spray | |
|---|---|---|---|---|---|
Different Methods of Hair Straightening
Welcome! If you’re looking for a way to straighten your hair, there are several methods available. Flat irons can provide temporary results and require frequent maintenance, while chemical straightening or rebonding treatments offer more permanent solutions.
For an intensive but healthy approach, Japanese Straightening (Thermal Reconditioning) and Keratin Treatment (Brazilian Straightening) use protein-based formulas to give smooth locks with great longevity.
Flat Iron
For smooth, sleek strands, opt for a flat iron with ceramic plates and negative ion technology to minimize damage. Use a heat protectant before straightening and section off hair into one-inch pieces. Different curl patterns may require various techniques; use a boar bristle brush or round brush to avoid static.
Hair Rebonding
Hair rebonding is a permanent solution for transforming every strand of your hair into sleek and smooth perfection. It involves using chemical relaxers, thermal reconditioning, or Brazilian treatment to permanently straighten the hair.
Smoothing masks can help keep frizz under control, while setting sprays hold the style in place.
Chemical Straightening (Hair Relaxing)
Chemical straightening, or hair relaxing, is a process that uses chemicals to break down the bonds in your hair and permanently alter its texture. It’s ideal for creating smooth locks without needing daily heat styling. Be aware of potential chemical effects before trying it; use temperature control to minimize heat damage and opt for keratin treatments if you’re concerned about breakage.
Japanese Straightening (Thermal Reconditioning)
Experience the ultimate transformation with Japanese Straightening for smooth, glossy hair that lasts. Rich in thermal benefits, this method of straightening offers superior heat protection and preserves hair health while providing a long-lasting style.
With its unique combination of Japanese pros and advanced tools, get ready to experience healthier-looking locks with more volume than ever before! Follow these tips to perfect your look: use protective products before styling; opt for lower temperatures; keep the iron moving quickly; brush out each section once done.
Keratin Treatment (Brazilian Straightening)
Keratin treatments offer a long-lasting solution to tame unruly locks, infusing hair with natural proteins for a smooth and silky finish. The treatment cost is usually higher than other straightening methods, but it can last up to six months without needing touch-ups.
Hair damage is minimal when done correctly by an experienced stylist during the salon visit. Post-treatment requires special care, such as washing your hair with sulfate-free products and avoiding heat styling tools for several days afterward, in order to maintain results longer.
With proper hair care and maintenance, you can enjoy sleek tresses that are frizz-free!
Frequently Asked Questions (FAQs)
What type of heat protectant should I use?
Use a heat protectant spray with an average of 300-350°F to shield your hair from damage. 80% of the time, using a product designed specifically for flat irons will provide optimal protection and frizz prevention.
How often should I deep condition my hair?
Deep conditioning your hair once or twice a week can help keep frizz at bay. Use nourishing masks to strengthen and protect, leaving you with smooth, manageable locks that defy the weather! Be sure to select one designed for your hair type for maximum results.
Is there a way to straighten my hair without using heat?
Yes! Try using a comb and styling products to achieve smoother, straighter hair without the use of heat. Experiment with different techniques like air-drying or plopping to get the perfect look for you.
How can I maintain my straightened hair for longer?
To maintain your straightened hair, use a heat protectant before blow-drying and flat ironing. Sleep on a silk bonnet or pillowcase to prevent frizz, and apply a smoothing serum afterward. Choose sulfate-free shampoo and conditioner for nourishment, detangle with fingers or a wide comb, and avoid products with silicone.
Are there any methods of straightening that are safer for my hair?
To straighten your hair in a safe way, try using lukewarm water and sulfate-free shampoo. Use conditioner and a heat protectant spray before blow-drying with a diffuser setting. Choose ceramic plates for your flat iron, keeping the temperature between 300-350°F.
Conclusion
At the end of the day, taming frizzy hair is no easy feat. But with the right products, tools, and techniques, you can achieve sleek, straight hair without sacrificing the health of your hair.
Start by washing your hair with a frizz-fighting shampoo and conditioner, detangling with a wide-toothed comb, and applying heat protectant before blow-drying.
From there, use a flat iron with temperature control and the chase method with a rattail comb to make sure every strand is flat and smooth.
Finally, finish off with a setting spray or serum to keep the style in place. With these tips, you’ll be able to straighten your frizzy hair like a pro in no time!

