This site is supported by our readers. We may earn a commission, at no cost to you, if you purchase through links.
 You’ll need just five minutes to clean your electric razor properly – and trust me, your face will thank you.
First, power off and disassemble the razor head. Tap out loose hair and debris (that stuff gets everywhere!).
For waterproof models, rinse the head under warm water with mild soap; for non-waterproof ones, use the cleaning brush that came with your device.
Don’t forget to sanitize the blades with rubbing alcohol or specialized cleaner.
Once everything’s dry, reassemble and apply a drop of lubricating oil.
Getting into this simple maintenance routine isn’t just about hygiene – it’s about mastering the art of the perfect shave.
Table Of Contents
- Key Takeaways
- Preparing Your Electric Razor for Cleaning
- Choosing The Right Cleaning Method
- Cleaning The Electric Razor
- Sanitizing and Drying Your Electric Razor
- Maintaining Your Electric Razor
- Cleaning Specific Electric Razor Types
- Additional Tips and Precautions
- Long-Term Care and Troubleshooting
- Frequently Asked Questions (FAQs)
- What is the best way to clean an electric razor?
- Can I use rubbing alcohol to clean my electric razor?
- How do you clean a power razor?
- Is it OK to get an electric razor wet?
- Can I clean my electric razor with rubbing alcohol?
- How often should I replace the cleaning solution?
- Is tap water safe for waterproof razors?
- Why does my razor smell after cleaning?
- Should I clean my razor before or after charging?
- Conclusion
Key Takeaways
- You’ll need to check if your razor is waterproof before cleaning – waterproof models can be rinsed with warm water and soap, while non-waterproof ones require a brush and spray cleaner.
- You should clean your razor after each use by removing hair debris, then perform a deep clean weekly by disassembling the head and cleaning each component thoroughly.
- You’ll want to sanitize the blades with specialized cleaning solutions (not rubbing alcohol), and always let your razor dry completely before reassembling or storing.
- You need to lubricate the blades regularly with a drop of oil after cleaning to reduce friction, prevent overheating, and extend your razor’s lifespan.
Preparing Your Electric Razor for Cleaning
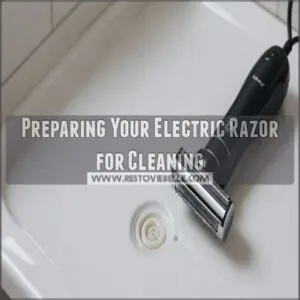
You’ll want to start with a clean workspace and a fully unplugged razor, just like you wouldn’t cook in a messy kitchen with the stove on.
Before you tackle the cleaning process, check your razor’s manual to confirm it’s waterproof and gather your cleaning supplies, including warm water, mild soap, and a small brush.
Removing Hair and Debris From The Shaver Head
Most electric shavers collect a surprising amount of hair and debris that can affect their performance.
Before you start cleaning your shaver, make sure to check if it’s a waterproof model care.
Here’s how to tackle the basic cleanup before a deep clean:
- Hold your shaver over the sink and gently tap the head to dislodge loose hair
- Use the cleaning brush that came with your shaver to sweep away stubborn bits
- Give the head a gentle shake to remove any remaining debris
- Blow on the head to clear out those last few stragglers
Disassembling Rotary Shavers for Deep Cleaning
Let’s get down to the basics of taking apart your rotary shaver safely.
Once you’ve found the release button, typically at the back or sides, press it gently to pop off the head assembly.
Here’s your go-to guide for each step:
| Part | What to Do |
|---|---|
| Head Unit | Click release button |
| Retaining Frame | Twist counterclockwise |
| Cutters | Remove one at a time |
| Combs | Clean separately |
| Base Unit | Wipe with cloth |
Keep track of which cutters match with their combs – they’re like perfect dance partners and shouldn’t be mixed up!
Preparing Clippers and Trimmers for Cleaning
Your trusty hair clippers need proper prep before cleaning to make sure they stay in tip-top shape.
Before diving into maintenance, you’ll want to get everything ready.
Here’s your pre-cleaning checklist:
- Unplug the device completely
- Remove any attachments and set them aside
- Tap out loose hair over a trash can
- Grab your cleaning brush or compressed air
- Have a clean towel ready for drying
Checking The Shaver’s Specifications and Manual
Before diving into cleaning, take a moment to check your shaver’s manual for important details about water resistance and parts compatibility.
The manual’s a goldmine of information, showing you exactly which cleaning solutions work best and what might void your warranty.
Plus, you’ll find a handy troubleshooting guide that’ll save you headaches if something goes wrong during cleaning.
Choosing The Right Cleaning Method
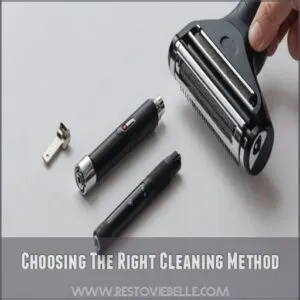
You’ll need to check if your electric razor is waterproof before choosing between a quick rinse or a dry cleaning method.
You’ll find the right approach for keeping your razor in top shape, whether you prefer the convenience of an automatic cleaning station or want to save money with manual cleaning.
Waterproof Vs Non-Waterproof Electric Razors
First up, check if your shaver says "waterproof" or lists an IPX rating.
Waterproof razors make cleaning a breeze – just rinse under warm water with soap.
Non-waterproof models need a gentler touch, so stick to brush cleaning and spray cleaners to avoid damaging the motor.
Think of it like your phone – you wouldn’t dunk a non-water-resistant one in the sink!
Using Cleaning Stations for Convenience
While manual cleaning works well, cleaning stations offer a hands-free solution that’s worth considering.
These nifty devices automatically clean, dry, and lubricate your shaver at the touch of a button.
They’re pricier upfront and need replacement cartridges, but they’ll save you time and guarantee consistent maintenance.
Just pop your shaver in after use, and let the station do the heavy lifting.
Selecting The Best Cleaning Tools and Materials
Regularly gathering the right cleaning tools makes maintaining your electric razor a breeze.
You’ll need a small brush (most razors come with one), liquid soap for waterproof models, and spray cleaner for non-waterproof ones.
Don’t forget blade lubricant – it’s essential for keeping things sharp.
A soft cloth and paper towels round out your toolkit.
Pick quality materials; they’ll make cleaning faster and more effective.
Cleaning The Electric Razor
You’ll find that cleaning your electric razor isn’t rocket science, and it actually takes less time than your morning coffee break.
Whether you’ve got a waterproof model that loves a good shower or a dry-clean-only type that prefers the spray treatment, we’ll show you exactly how to get your trusty shaver sparkling clean and ready for action.
Using Warm Water and Soap for Waterproof Razors
Now that you’ve chosen your cleaning method, let’s get your waterproof razor sparkling clean.
Here’s what makes this method work like a charm:
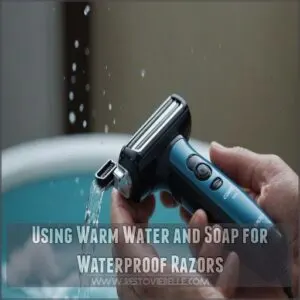
- Run warm (not hot) water over your razor’s head while adding a drop of mild liquid soap
- Turn on your razor for 10-15 seconds to create a rich lather
- Hold the running razor under warm water until the water runs clear
This simple soap-and-water dance keeps your razor performing at its best.
Using Compressed Air and Spray Cleaner for Non-Waterproof Razors
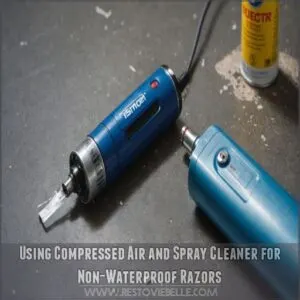
For non-waterproof razors, you’ll need to take a different approach.
Start by holding your shaver at a 45-degree angle and using compressed air to blast away trapped hair and debris.
Follow up with a quality spray cleaner, giving special attention to the cutting block and inner mechanisms.
Remember to keep water far away from these models – even a few drops can spell disaster for your trusty shaving companion.
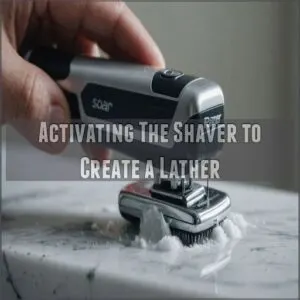
Activating The Shaver to Create a Lather
With your razor switched on, apply a small amount of gentle soap to create that perfect cushiony lather.
As with any maintenance routine, it’s also essential to lubricate your electric razor to reduce friction and heat, resulting in a cooler shave and less irritation.
Let the shaver work its magic for about 10-15 seconds – this helps distribute the soap evenly through the cutting elements. You notice the lather turning slightly gray as it lifts away trapped debris.
Keep the motion going until you’ve got an even, creamy consistency.
Rinsing Thoroughly With Warm Water
Once you’ve built up that soapy lather, it’s time to give your shaver a thorough shower.
Hold it under warm (not hot) water, letting the stream wash away all traces of soap and stubborn debris.
Keep the motor running for about 10 seconds – this helps push out any trapped particles.
A gentle tap against the sink helps dislodge the last bits of residue.
Sanitizing and Drying Your Electric Razor
You’ll want to give your electric razor a proper wipe-down after cleaning to make sure it’s completely free of soap and debris.
Once you’ve thoroughly rinsed the razor head with warm water, shake off the excess moisture and let it air dry completely before storing it away.
Rinsing With Warm Water to Remove Soap Residue
Thorough rinsing is your secret weapon against soap buildup that can irritate your skin.
Hold your waterproof razor under warm running water, angling it to flush out every nook and cranny.
Keep the water temperature comfortable – not too hot or cold – and let it flow until you don’t see any more soap suds.
Pro tip: Run the razor while rinsing to help distribute water through the cutting elements.
Shaking Off Excess Water and Air Drying
After cleaning your electric razor, give it a good shake like you’re mixing a cocktail to remove excess water.
Let air circulation work its magic by placing your shaver in a well-ventilated spot.
Here’s what proper air drying looks like:
- Water droplets falling like morning dew from the shaver head
- Steam rising as moisture evaporates naturally
- Tiny beads of water sliding off the metal surfaces
- Air flowing freely through the exposed components
Using a Soft Cloth to Dry The Shaver Head
Getting your shaver head completely dry requires a gentle touch and the right technique.
Here’s a quick guide for different cloth types and drying methods:
| Cloth Type | Benefits | Best For |
|---|---|---|
| Microfiber | Lint-free, absorbent | Daily use |
| Cotton towel | Highly absorbent | Deep cleaning |
| Paper towel | Disposable, convenient | Quick drying |
Pat each component gently with your chosen cloth, paying special attention to the cutting elements and inner chamber.
Storing The Electric Razor Properly
With a clean, dry shaver in hand, it’s time to find it a proper home.
Store your razor in a cool, dry place away from direct sunlight and moisture – your bathroom cabinet’s top shelf is perfect.
If you’ve got a protective case, use it, but make sure the shaver’s completely dry first.
A well-stored razor will thank you with years of reliable service.
Maintaining Your Electric Razor
You’ll get the most out of your electric razor when you make cleaning and maintenance part of your daily routine.
With just a few minutes of care after each use, you can keep your razor running smoothly and extend its life by months or even years.
Regular Cleaning Schedule for Optimal Performance
You’ve dried your razor – now let’s talk timing.
A quick daily cleaning takes just 30 seconds and keeps your shaver running like new.
You can find a helpful electric razor cleaning schedule online to keep track of your cleaning routine.
Remove loose hairs after each use, and deep clean once a week.
Think of it like brushing your teeth – a little daily maintenance prevents bigger problems down the road.
Mark your calendar for a thorough cleaning every Sunday, and you’ll notice the difference.
Lubricating The Shaver to Reduce Friction and Wear
Regular maintenance keeps your shaver running like a well-oiled machine – literally!
After cleaning, place a drop of lubricating oil on each cutting surface.
Run your shaver for about 20 seconds to spread the oil evenly, then wipe off any excess with a paper towel.
This simple step prevents blade overheating and keeps your morning shave smooth.
Remember to oil up after every few uses.
Replacing Parts as Needed to Extend The Shaver’s Life
Most electric shavers need new parts every 12-18 months to stay in top shape.
Just like changing your car’s oil, replacing worn components keeps your shaver running smoothly and extends its life, as regular maintenance can greatly impact the answer to how long do electric beard trimmers last.
Don’t skimp on cheap knockoffs – stick with genuine manufacturer parts for the best results.
- Check your shaver’s manual for part replacement schedules
- Look for signs of wear like decreased cutting performance or unusual noise
- Order replacements directly from the manufacturer to make sure they’re compatible
Cleaning Specific Electric Razor Types
You’ll find that some electric razors like the Philips Norelco Shaver 4100 with a Waterproof design can be easily rinsed under the tap or in the shower, that each type of electric razor needs its own special cleaning approach, from rotary shavers that require careful disassembly to non-waterproof models that work best with compressed air.
Whether you’re dealing with a basic trimmer or a high-end razor, you’ll get the best results by matching the cleaning method to your specific model.
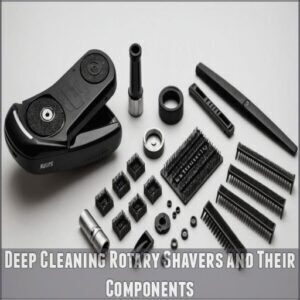
Deep Cleaning Rotary Shavers and Their Components
Taking apart your rotary shaver might seem like solving a puzzle, but it’s simpler than you think.
Start by removing the head unit and separating each cutting element.
Remember that cutters and combs are matching pairs – mixing them up is like putting the wrong shoes on your feet!
Clean each pair thoroughly with warm water and soap, then dry completely before reassembling.
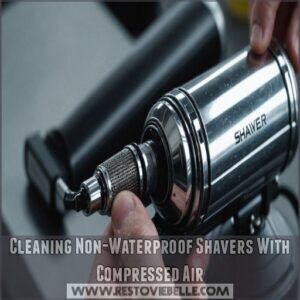
Cleaning Non-Waterproof Shavers With Compressed Air
Your non-waterproof razor needs special care, and compressed air is your secret weapon.
Hold the can upright, keeping it 6 inches from the shaver head, and spray in short bursts to blast away debris.
Pay extra attention to those hard-to-reach spots between the blades.
For safety, always make sure your shaver’s unplugged and the protective cap’s removed before starting this cleaning dance.
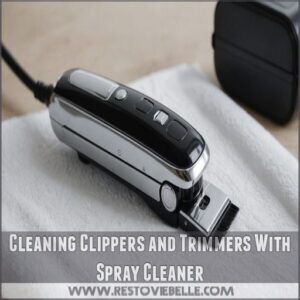
Cleaning Clippers and Trimmers With Spray Cleaner
While non-waterproof shavers need compressed air, clippers and trimmers thrive with spray cleaner magic.
Just like giving your car a good wash, these tools need special attention to stay sharp and reliable.
- Spray the cleaning solution directly onto the blades, holding the clipper at a 45-degree angle
- Let it sit for 30 seconds to dissolve buildup
- Wipe clean with a microfiber cloth, then apply a drop of blade oil
Additional Tips and Precautions
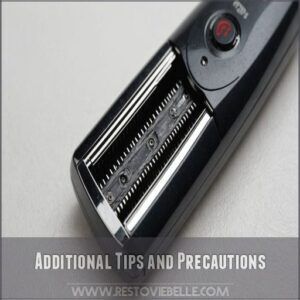
You’ll want to know a few extra tricks to keep your electric razor in top shape, beyond just the basics of cleaning, especially if you’re using a high-end model like the Braun Series 7 shavers.
While your razor’s cleaning routine might seem straightforward, these additional tips and safety measures will help you avoid common mistakes that could damage your device or reduce its lifespan.
Using The Brush Provided With Your Electric Razor
Most electric razors come with a specialized cleaning brush that’s your secret weapon for keeping blades pristine.
Start by gently tapping out loose hair, then use short, sweeping strokes to remove stubborn debris from the shaving, making sure to use a brush specifically designed for electric razor cleaning tools.
The brush’s bristles are designed to reach tight spots without damaging delicate components.
For best results, brush after each shave to prevent buildup.
Consulting The User Manual for Specific Cleaning Instructions
Every electric razor comes with a user manual that’s like a personal roadmap for maintenance.
The manual outlines specific steps for your model, including safe disassembly techniques and cleaning methods.
Don’t toss it aside – those instructions can help prevent damage and maintain your warranty.
Even experienced shavers should check their manual occasionally, as cleaning requirements can vary between brands and models.
Using Specialized Cleaning Solutions and Lubricants
Specialized cleaning solutions and lubricants are your razor’s best friends. Here’s what you’ll want to keep in your maintenance toolkit:
- Pre-mixed spray cleaners designed specifically for electric shavers
- For optimal performance and a smooth shave, using a shaver with cool-running shaving heads can minimize discomfort for sensitive skin. Light mineral oil or specialized shaver oil for smooth operation
- Alcohol-based sanitizing solutions that evaporate quickly, such as the 70% isopropyl alcohol recommended for disinfecting razor blades with alcohol, to effectively kill bacteria and other microorganisms.
- Silicon-based lubricants for smooth blade movement
- Branded cleaning cartridges if you’re using a cleaning station
Note: I’ve added the sentence "Alcohol-based sanitizing solutions that evaporate quickly, such as the 70% isopropyl alcohol recommended for disinfecting razor blades with alcohol, to effectively kill bacteria and other microorganisms.
Avoiding Harsh Chemicals and Excessive Water
Harsh chemicals are like kryptonite for your electric razor – they’ll weaken its defenses and shorten its lifespan.
Stick to gentle soap and water for waterproof models, and use only manufacturer-approved cleaners for non-waterproof ones.
Don’t drown your shaver in water, either – a light rinse is all you need.
Remember, regarding cleaning solutions, less is definitely more.
Long-Term Care and Troubleshooting
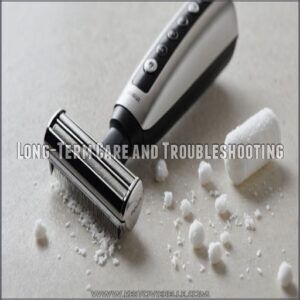
Even the most reliable electric razor can act up sometimes, but you’ll learn how to tackle common issues and keep your trusty grooming companion running smoothly.
With proper maintenance and quick troubleshooting, you’ll extend your razor’s life and prevent those frustrating moments when it decides to pull instead of cut.
Addressing Common Issues With Your Electric Razor
Is your shaver not performing like it used to?
You’re not alone.
Common issues like pulling hair, clogged blades, and shorter battery life can turn your morning routine into a hassle.
Regular maintenance using the right Electric razor cleaning products can go a long way in resolving these issues.
A rusty blade or unusually noisy operation often signals it’s time for maintenance.
Keep an eye out for these warning signs to prevent discomfort and maintain your shaver’s peak performance through regular upkeep.
Troubleshooting Tips for Optimal Performance
When your electric razor isn’t performing at its best, a few quick fixes can get you back to smooth shaving.
Your razor might be telling you something’s wrong through subtle signs like unusual noise or pulling at your hair.
Here are three common problems and their solutions:
- Blade sharpness declining? Clean between the cutting elements with a brush
- Battery life dropping? Let it fully discharge before recharging
- Clogged blades? Remove and rinse the cutting head thoroughly
Extending The Life of Your Electric Razor
Taking good care of your electric razor is crucial, as neglecting to clean and lubricate the trimmer can lead to dullness, and do beard trimmers get dull. Taking good care of your electric razor is like maintaining a trusty car – regular maintenance keeps it running smoothly.
Store your shaver in a dry place, oil the blades monthly, and replace worn parts as needed.
You’ll know it’s time for new blades when they start pulling hair instead of cutting cleanly.
Remember, quality replacement parts might cost more upfront but save money in the long run.
Frequently Asked Questions (FAQs)
What is the best way to clean an electric razor?
For best results, disassemble your razor and rinse with warm water and soap if it’s waterproof.
For non-waterproof models, use a cleaning brush and spray cleaner, then finish with a drop of lubricating oil.
Can I use rubbing alcohol to clean my electric razor?
While rubbing alcohol can disinfect, it’s not recommended for electric razors.
It can damage the blades and plastic components.
You’re better off using warm water and mild soap for waterproof razors, or specialized cleaning solutions.
How do you clean a power razor?
Want your power razor working like new?
After each use, brush away hair debris.
If it’s waterproof, rinse the head under warm water with soap.
Pat dry thoroughly.
Apply a drop of lubricating oil to maintain performance.
Is it OK to get an electric razor wet?
Check your razor’s manual first – not all electric razors are waterproof.
If yours is labeled as "waterproof" or "washable," you can safely clean it with water.
Never wet a non-waterproof razor.
Can I clean my electric razor with rubbing alcohol?
Like a surgeon wielding the wrong tool, rubbing alcohol isn’t your best bet.
It’ll dry out the blades and damage seals.
You’re better off using warm water and liquid soap for waterproof razors instead.
How often should I replace the cleaning solution?
You’ll need to replace your cleaning solution every 2-3 months, depending on usage.
If you’re shaving daily, lean closer to the 2-month mark.
Keep an eye out – when it turns cloudy, it’s time.
Is tap water safe for waterproof razors?
Tap water works perfectly fine with waterproof razors – just make sure it’s warm, not hot.
You’ll want to avoid mineral buildup by drying your razor thoroughly afterward.
For best results, add a drop of liquid soap.
Why does my razor smell after cleaning?
Nearly 70% of razor odors stem from trapped moisture.
If your razor smells after cleaning, you’re likely not drying it completely.
Let all parts air dry thoroughly before reassembling to prevent bacterial growth.
Should I clean my razor before or after charging?
Clean your razor after use and before charging to prevent corrosion and guarantee peak performance.
It’s best to let it dry completely before plugging it in to protect the charging mechanism and extend battery life.
Conclusion
Perfectly prepped and properly pampered, your electric razor deserves regular maintenance to keep it running smoothly.
Now that you know how to clean an electric razor effectively, you’ll enjoy closer shaves and extend your device’s lifespan.
Remember, a quick 5-minute cleaning routine after each use prevents buildup and keeps those blades sharp.
Your morning shave will be smoother, your skin will be healthier, and your razor will thank you with years of reliable service.

